PERMISSIONS Full Access or Team Access privileges in Workplace Manager
NAVIGATION
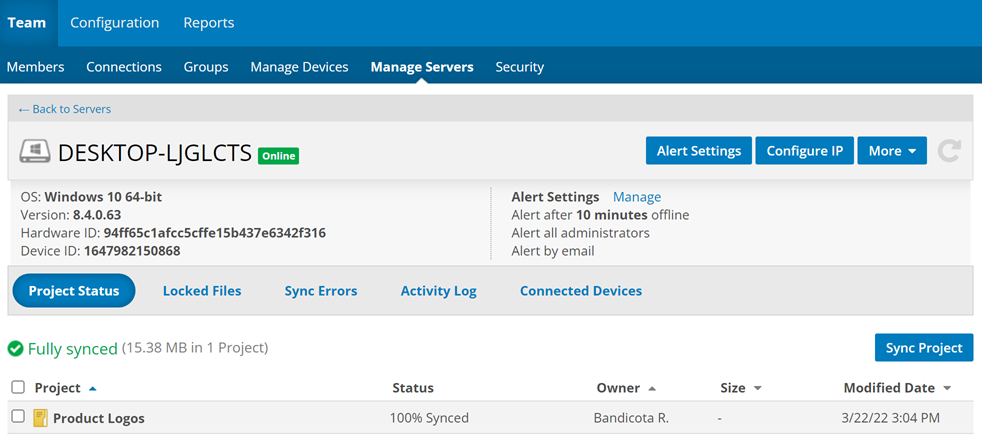
This page displays detailed information about your server, and provides access to a variety of server management tools.
The top portion of the page displays general information about the server, including connection status, operating system, version, hardware ID, and device ID, and alert settings information.
The areas at the bottom of the page display additional information about the server. Click an area title to display it. Click a link below to learn more about each area:
Server details: Project Status
Server details: Connected Devices
How to...
- Click the Alert Settings button at the top right of the page, or click the manage link next to the alert settings information. This will open the Alert Settings popup:

- Make your alert settings selections as follows:
- Click the Save button.
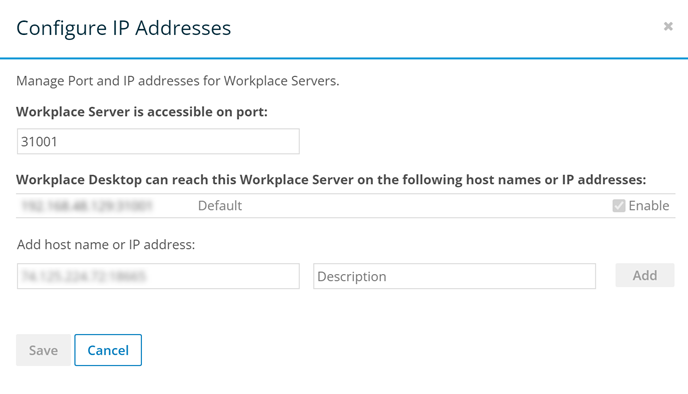
- Click the Configure IP button at the top right of the page. This will open the Configure IP Addresses popup:

- Complete or update the fields in the popup as follows:
| Area/Field | Definition |
|---|---|
| Workplace Server is accessible on port: | Enter or update the port on which Workplace Server is accessible. |
| Workplace Desktop can reach this Workplace Server on the following host names or IP addresses: | This area lists all the host names and IP addresses at which Workplace Desktop can reach this Workplace server. To enable or disable the first host name or IP address, select or clear the Enable check box. You cannot disable this item if there are no secondary host names or IP addresses. To remove an item, click the X icon associated with it. You cannot delete the first host name or IP address. |
| Add host name or IP address | To add an item to the list described above, enter a host name or IP address, optionally enter a description, then click the Add button. |
IMPORTANT Make sure that the ports you specify are open on your firewall.
- Click the Save button.
- Click the More button at the top right of the page, then select Rename.
- Enter the new name in the resulting popup.
- Click the Save button.
NOTE Use this option to temporarily disable the device. Disabled devices still consume a license.
IMPORTANT Disabled Workplace servers cannot connect to the service until enabled again.
NOTE Files stored on a recycled server will be deleted in 90 days. Any necessary files may be restored during this period.
- Click the More button at the top right of the page, then select Manage Workplace Server. The following page popup will display:

- Read the warning message in the Manage Workplace Server popup, then click the Recycle button.
- Click the Recycle button.


