PERMISSIONS Administrator or Super Administrator privileges in Workplace
NAVIGATION Workplace Online > Team > Users > + Add a User button
You'll use this view to add users to your team one at a time. If you want to add several users at once, refer to Import users.
TIP
How to...
- Go to Workplace Online > Team > Users.
- Click the + Add a User button.
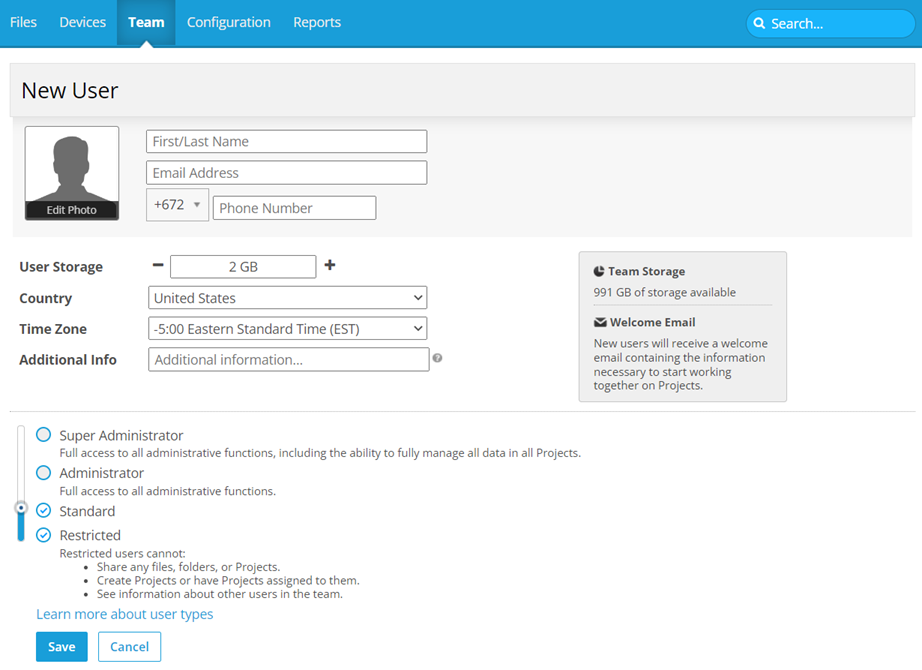
- Complete the fields on the New User page as described in the table below:
| Field | Description |
|---|---|
| First Name/Last Name | Enter the first and last name of the user. |
| Email Address | Enter the email address of the user. |
| Phone Number | Select a prefix, if necessary, then enter the user's phone number. |
| User Storage (metered plans only) |
Use the + and - icons to increase or decrease the amount of storage available to the user, or enter an amount manually. The default value for this field is 2GB. For unlimited plans, this field displays the word Unlimited and cannot be edited. |
| Country | Select the user's country. |
| Time Zone | Select the user's time zone. |
| Additional Info | Enter any additional information about the user. This information will be displayed on the User details and Edit a user pages. |
| User type | Use the slider to select the appropriate user type. Your selection here will determine what the user can see and do in Workplace. For details, refer to User types. |
- Click Save.


