PERMISSIONS Full Access or Team Access
NAVIGATION
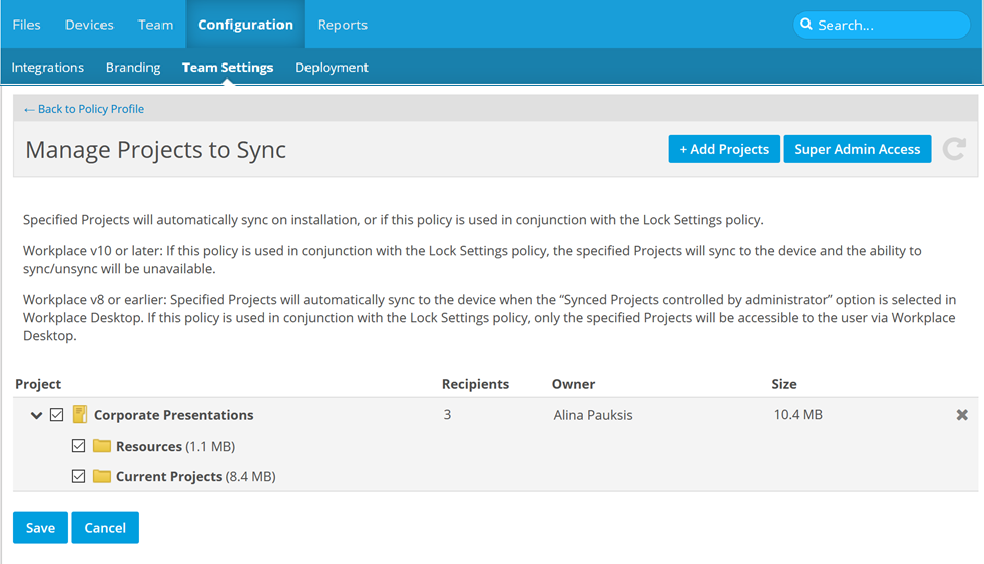
The Projects to Sync policy allows you to specify which projects or folders within the project will automatically sync to a device. Once this policy is added to a policy profile, you can designate new path(s) on this page.
In Workplace v10 or later, if this policy is used in conjunction with the Lock Settings policy, the specified projects will sync to the device and the ability to sync/unsync will be unavailable.
In Workplace v8 or earlier, the projects specified on this page will automatically sync to the device when the Synced Projects controlled by administrator option is selected in Workplace Desktop. If this policy is used in conjunction with the Lock Settings policy, only the specified projects will be accessible to the user via Workplace Desktop.
In Workplace v8 or earlier, you may wish to use this policy to allow users to Edit documents locally via Workplace Online, but prevent syncing to their Workplace folder.
If the Projects to Sync policy is enabled, the Project list controlled by administrator check box on the Workplace Desktop Sync tabwill be selected by default upon installation, but users may clear the check box to customize the projects they wish to sync.
If the user selects the check box again, only projects designated in this policy will be synced.
TIP To lock down all Workplace Desktop user options, you can apply the Lock Workplace Desktop Preferences policy.
TIP If you enable the Lock Workplace Desktop Preferences policy, changes you make to the Projects to Sync and Backup Folders policies (like adding new projects to sync) will automatically be propagated to Workplace Desktop devices affected by the changes. Once that's done, you can disable the Lock Workplace Desktop Preferences policy to allow users to regain control, if you wish.
For more information, refer to Select Policies.
How to...
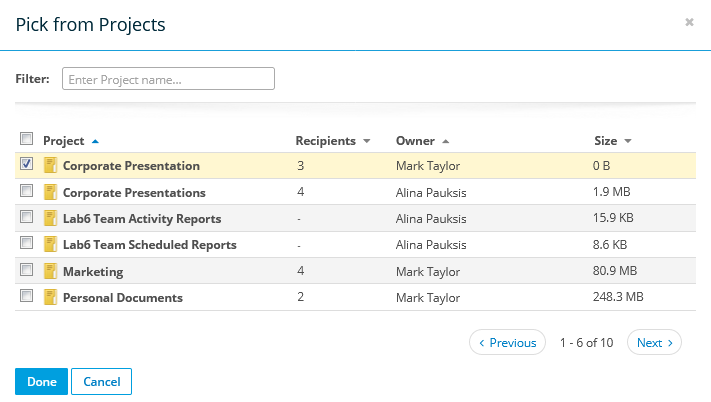
PERMISSIONS Super administrators will see a Super Admin Access button at the top right of the screen, which allows them to add projects they don't own and that haven't been shared with them. These projects will be marked with a Restricted badge. To add these projects, click the Super Admin Access button, enter your Workplace password, and click Continue, then proceed as described below. Even though you can select projects to sync, only the projects or folders that have been shared with the user will be synced to their device.
NOTE When you add a project to this list using the process described above, the entire project is selected by default.
- To choose or omit one or more specific project folders, click the > arrow next to the project name, then select or clear the appropriate check boxes.
- To choose or omit an entire project, select or clear the corresponding check box.
- Click the Save button.
Click the X icon next to the project you wish to remove.


