PERMISSIONS Full Access or Team Access privileges in Workplace Manager
NAVIGATION
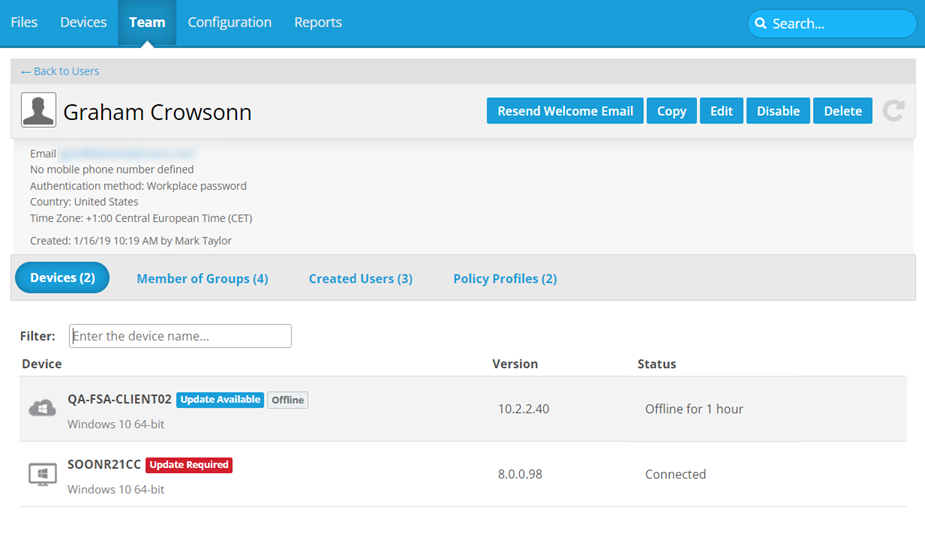
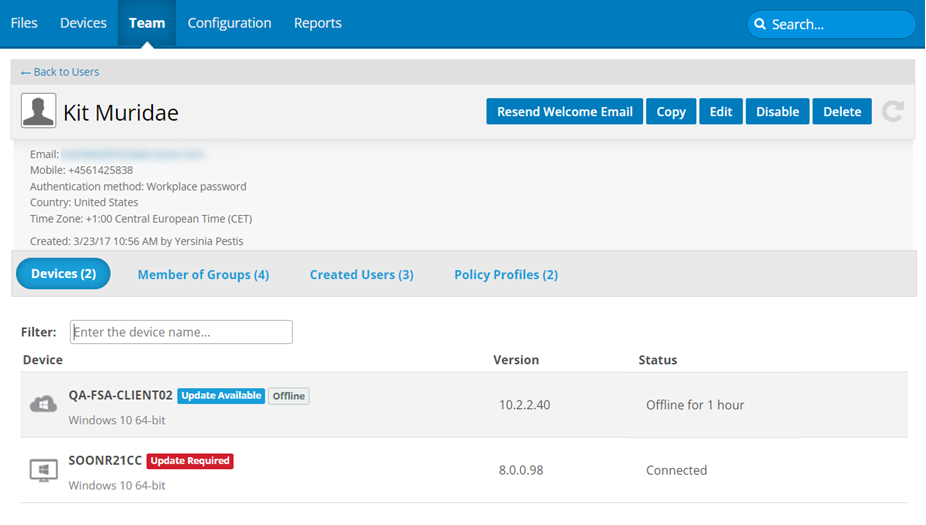
This page displays detailed information about a single user, and allows administrators to perform a variety of functions.
The list in the lower portion of the page displays the user's devices, the groups to which they belong, the policy profiles assigned to the user, and the other users added by the user.
The interface and and available functions on this page depend on whether this is a metered or unlimited storage plan team.
| Metered | Unlimited |
|---|---|
|
|
How to...
- Click the user's email address link.
- A blank message with the recipient field already populated will open in your default email application.
- Click the Resend Welcome Email button.
- Click the Resend button in the confirmation popup.
PERMISSIONS Only available to administrators.
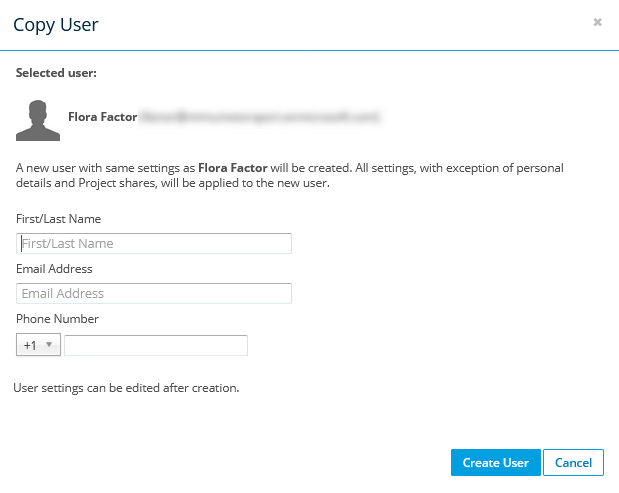
NOTE There are several different ways to copy new users from existing ones. For more information, and to find out which method best suits your needs, please refer to Create new users by copying an existing user.
- Enter the full name, email address and (optionally) the phone number:
- Click Create User.
PERMISSIONS Only available to administrators.
- Click the Edit button.
- Update user information as necessary.
TIP For detailed information for these fields, refer to Edit a user.
- Click Update.
PERMISSIONS Only available to administrators.
NOTE You can only disable a user who is currently enabled. You can only enable a user who is currently disabled. You cannot disable yourself.
A disabled user cannot log in, but will continue to consume a license and the storage allocated to them, if applicable.
- Click the Disable or Enable button.
- Confirm the action.
PERMISSIONS Only available to administrators.
NOTE You cannot delete yourself.
- Click the Delete button. If the user is not a project owner and has no devices associated with them, skip to step 6.
If the user is a project owner, or if they have synced devices associated with them, this page will display: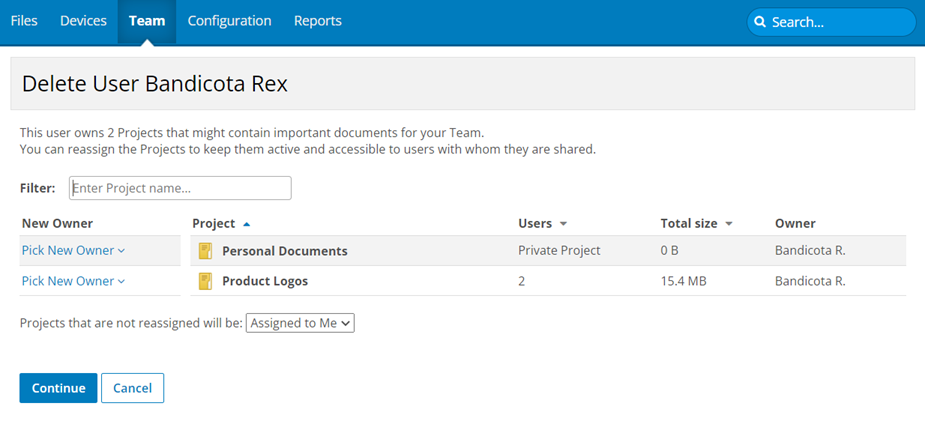
- For projects:
- Select new project owners from the dropdown menus for each project (you can choose yourself), then
- In the Not reassigned project will be: field, you can choose to assign to yourself all projects that you have not explicitly reassigned, or delete all projects that have not been reassigned.
- For devices, choose which action you want to take (Wipe or Don't Wipe) for each device associated with the user. When a device is wiped, it is also purged.
- Click Continue.
- The Delete User page will display.


NOTE This page summarizes the actions that will take place when you complete deletion, i.e. project reassignment or deletion, remote device wipe.
- If you have chosen to delete in the previous step, you must select the confirmation check box.
- Click Delete.
PERMISSIONS Only available to administrators.
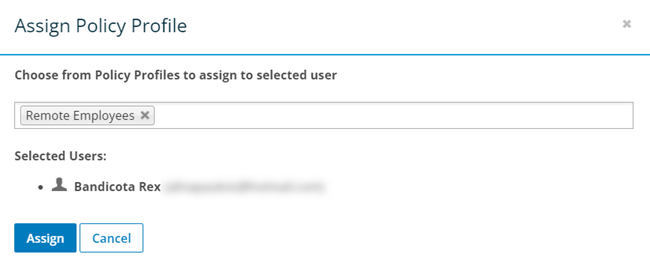
BEFORE YOU BEGIN Before you can add a user to a group, you must first create the group. For more information, refer to Groups.
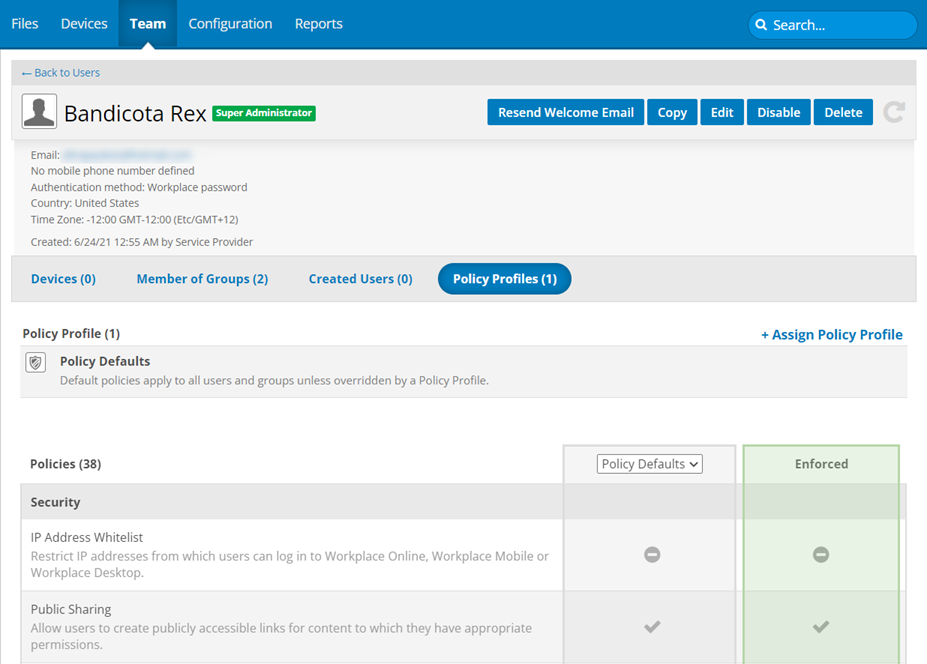
NOTE You cannot exempt a user from individual policies, only policy profiles.
NOTE This view will list the policy profiles currently assigned to the user, as well as a list of all individual policies for any profiles that have been assigned to the user. The first column has a dropdown which allows you to select from the policies assigned. The second column shows the policies that are actually applied. Use this list to review the currently applied policies before proceeding.
- Click the
 icon corresponding to the policy profile from which you wish to remove the user. This will open the Remove User/Group From Policy Profile page:
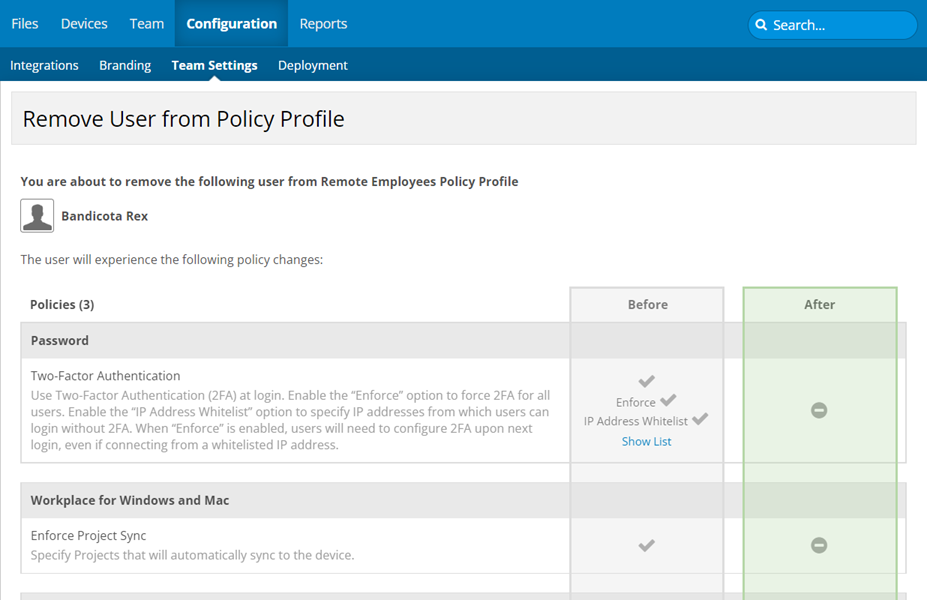
NOTE This page will display a "before and after" snapshot of the policy changes that will be applied if you proceed.
- Review the changes the user will experience if you remove them from the profile.
- Click the Remove button.
