IMPORTANT This integration is only accessible if it was configured before the release of Integrated Billing via Autotask in June 2023. To ensure the best possible experience, please switch to Integrated Billing via Autotask as soon as possible.
PERMISSIONS API user license type in Autotask. Please refer to How do I create an API user in Autotask for my Workplace/Autotask integration?
NAVIGATION  > Autotask Integration
If you are a Autotask customer, integrating Autotask with Workplace Manager allows you to process support requests as Autotask tickets, and bill for Workplace services using Autotask contracts.
To get started, you must connect your Autotask account to Workplace Manager, and transfer the services in your Workplace plan to Autotask.
How to...
- Log into Workplace Manager.
- Go to
 > Autotask PSA Integration.
 - Click Manage Autotask PSA Connection.
- Enter your API user credentials.
IMPORTANT An API user is a special type of account that is required to work with Autotask APIs. These accounts are free of charge and do not provide access to the Autotask UI. To learn more, please refer to How do I create an API user in Autotask for my Workplace/Autotask integration?, or to go directly to detailed instructions on creating API users in the Autotask online help system here.
- Click Connect.
NOTE Workplace Manager will use the login credentials to identify and retain your Autotask zone and database information. If we are able to establish a connection, you will see a yellow bar at the top: Connection was established. If you entered invalid credentials, a red bar will appear: Failed to establish connection.
- You will be returned to the previous page, and your Workplace Manager account is now connected to your Autotask database.
IMPORTANT If you change your Autotask API User password, remember to update your credentials in Workplace Manager!
When we set up your Workplace Manager portal, we provision it with the Datto Workplace plan. This plan contains the Workplace services you can sell to you clients.
The plan is very simple: you can sell licenses that already include a default storage quota, and additional storage. Both types of services can be billed on a yearly or monthly basis, so that your plan will have a total of 4 services.
To make the services available for billing using an Autotask contract, they must be transferred to Autotask.
To sync the services to Autotask, do the following:
- On the
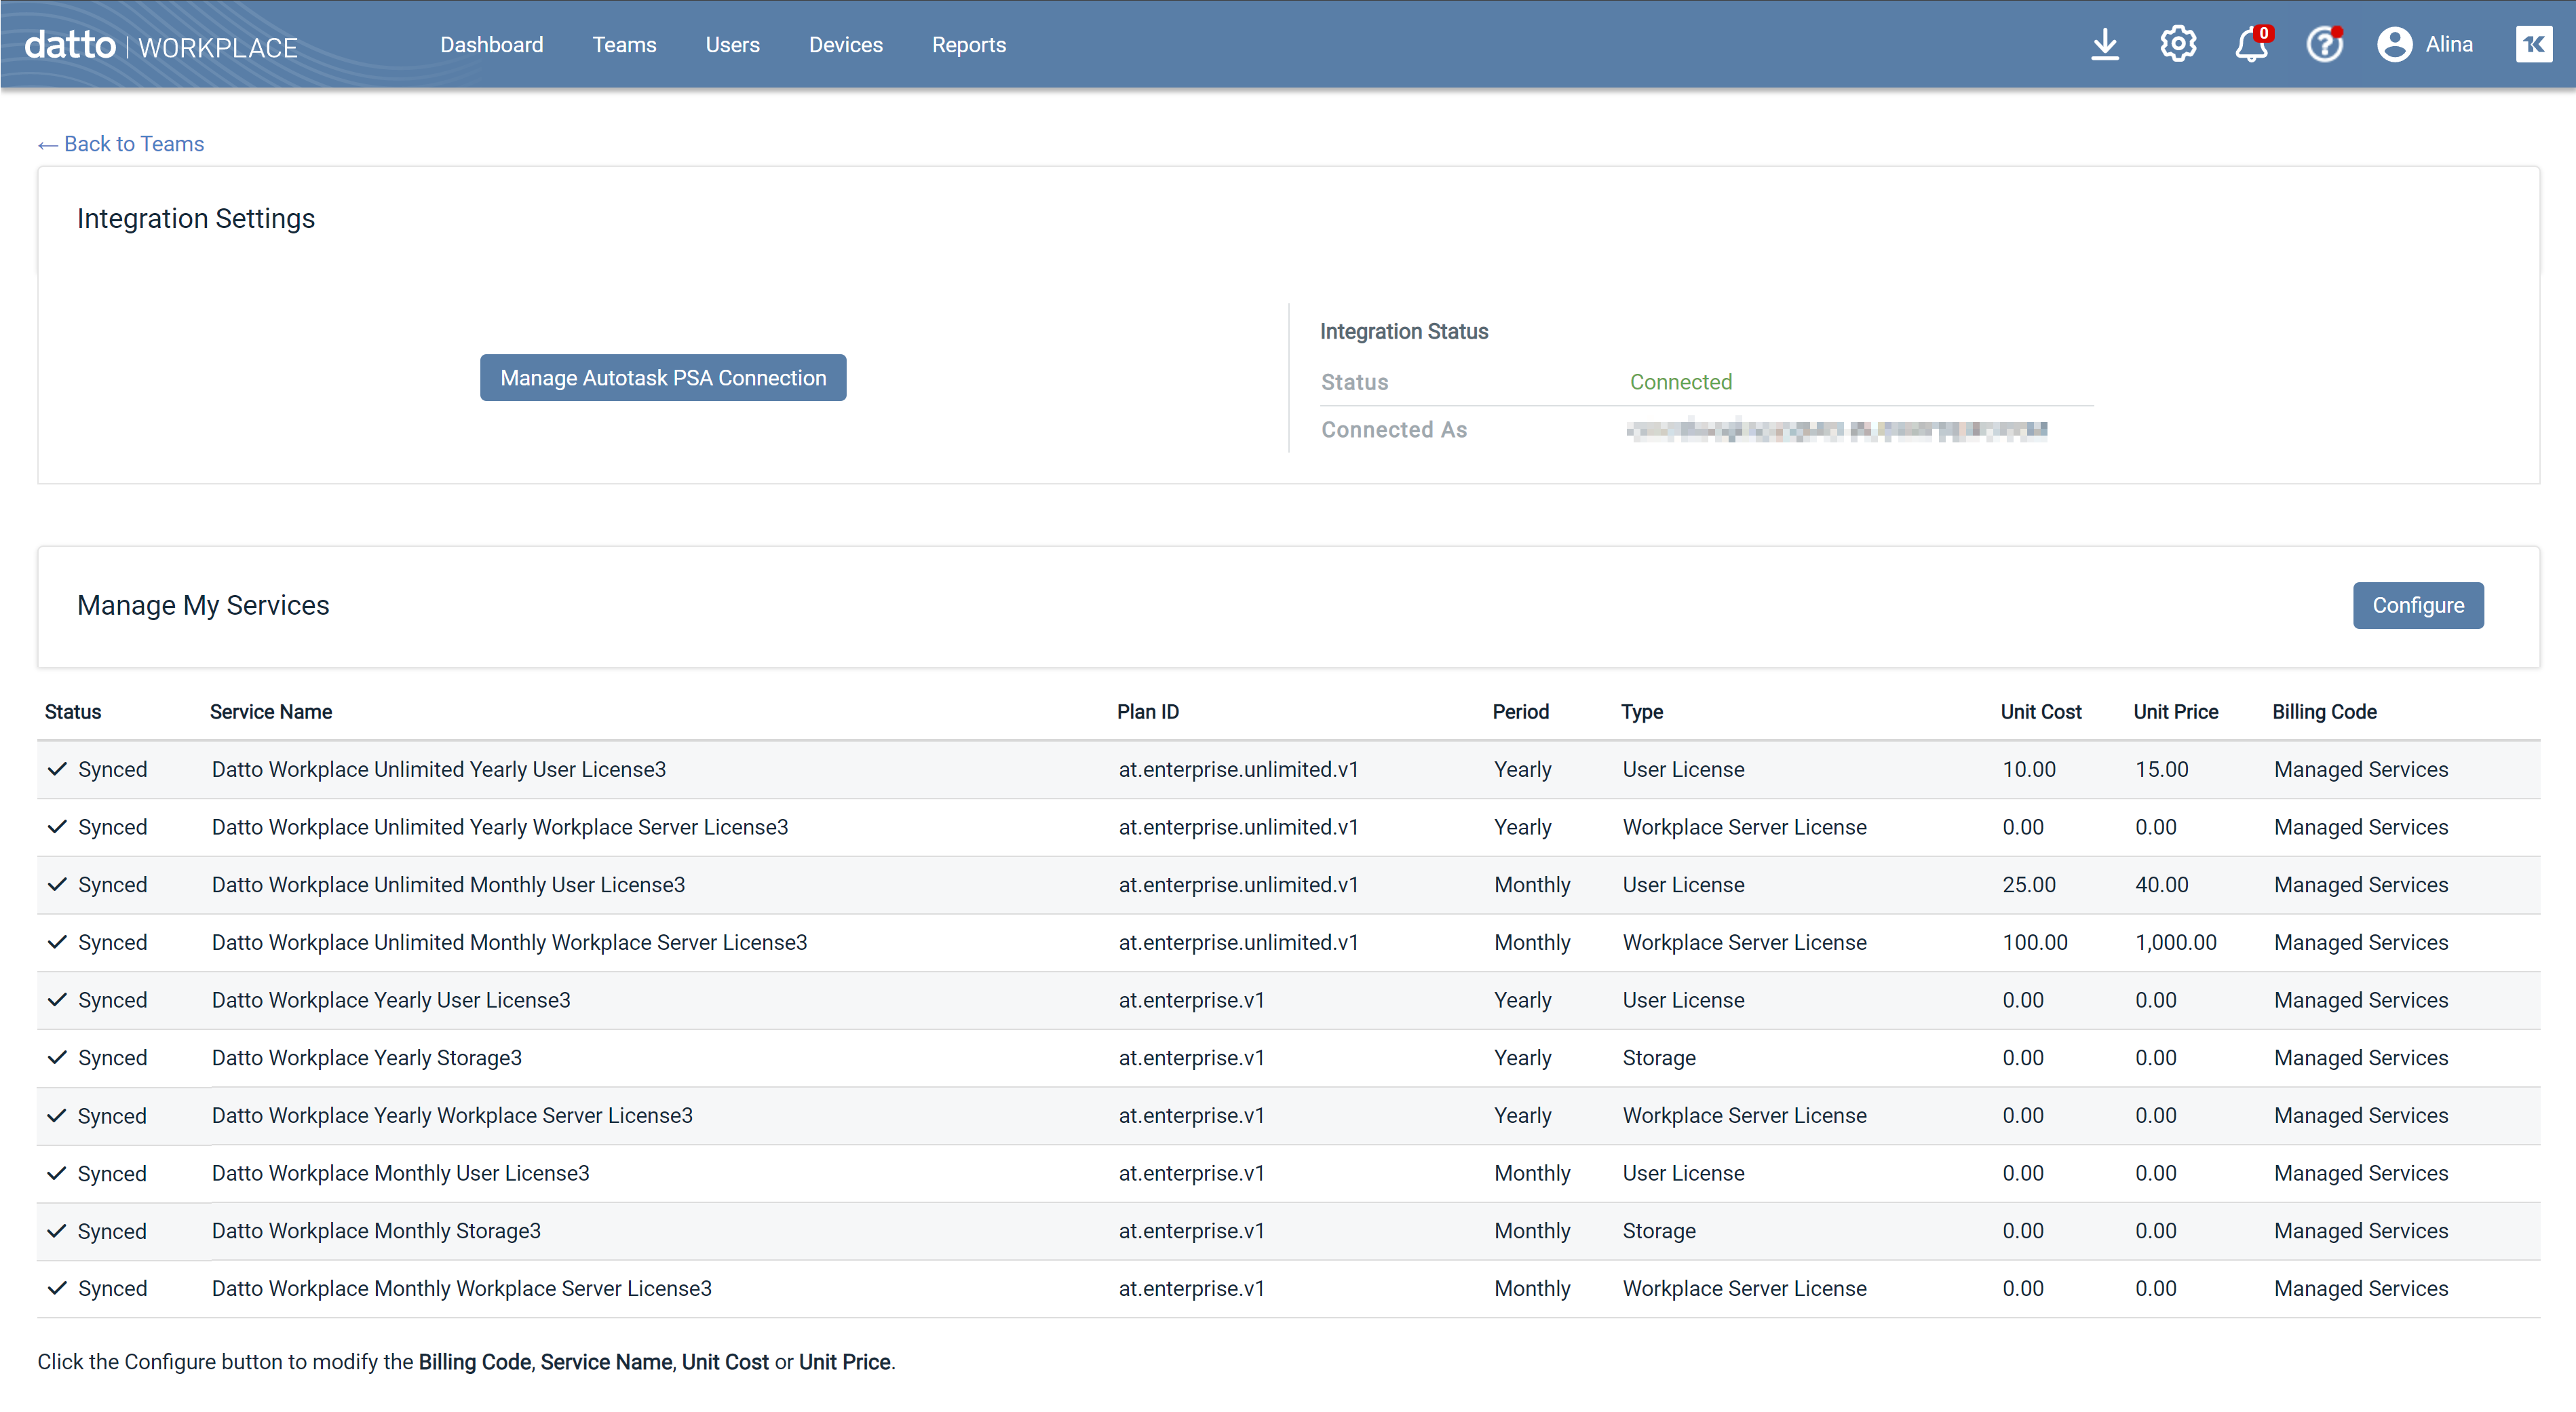
 > Autotask PSA Integration page, click Configure in the Manage My Services section:
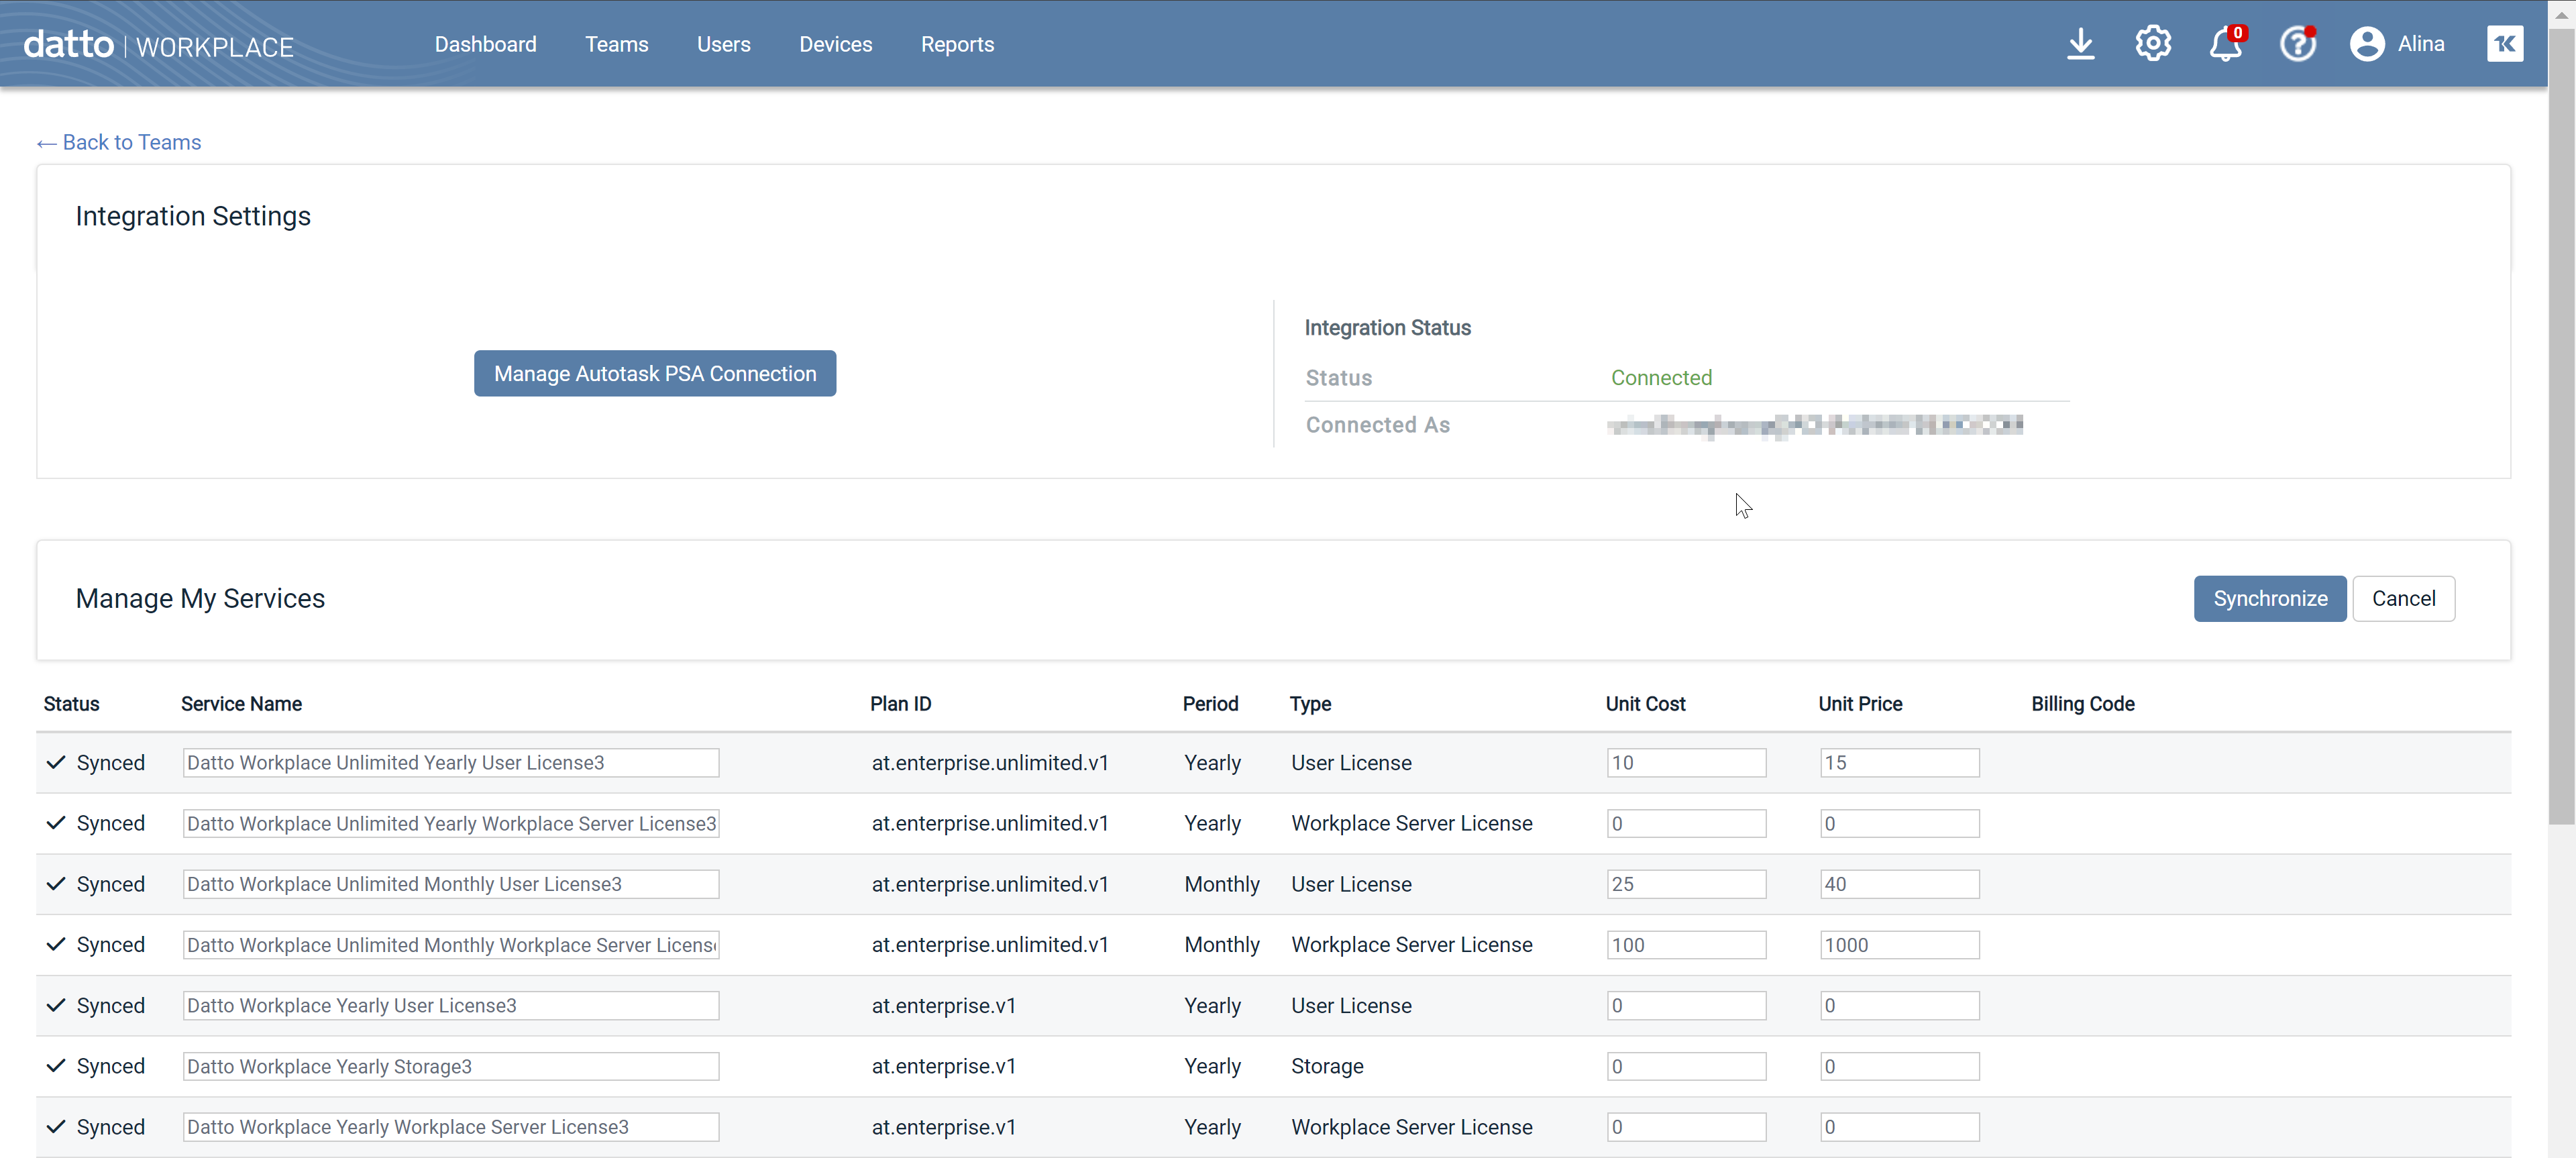
- The Autotask PSA Integration/Manage My Services page will open. All services associated with the Workplace plan will be displayed:

- Edit the default Service Name to the name you want to display on your Autotask client invoices.
IMPORTANT The service names you enter here must be unique in Autotask, or the synchronization will fail.
- For each service, enter the Unit Cost and Unit Price that will be the default cost or price in Autotask.
TIP We recommend that for unit cost, you factor the amount you pay Autotask for each unit, plus any administrative costs.
- From the dropdown, select the Autotask Billing Code that will be used to determine tax settings in Autotask.
The Services list displays the following columns:
| Name | Description | Name in Autotask Services List |
|---|---|---|
| Status | Indicates if the plan services have been synchronized with the Autotask Services list. The following sync states are possible: • Not synced - The services have not been transferred to the Autotask Services list. • Synced - The services have been transferred successfully • Error - a sync attempt or update attempt was made, but resulted in an error. |
n/a |
| Service Name | The name of the service that will be used in both applications. The Service Name will appear on invoices, so we recommend that you change the names with that in mind. Click Modify to change the name of the services in Workplace. NOTE Services can also be edited in Autotask, but if you synchronize the plans again, the Autotask settings will be overridden. |
Service Name |
| Plan ID | The internal name of the plan the services are associated with. | n/a |
| Period | The billing period associated with the service in Autotask. There are only 2 options, Monthly, and Yearly. | Period Type |
| Type |
The type of service the customer is being billed for. There are three service types: License, Server, and Storage. NOTE 1 unit of storage in Autotask is equivalent to 1GB of additional storage in Workplace. |
n/a |
| Unit Cost | The cost that will be the basis of any profitability calculations for the service. This will be the amount we will charge you, plus any incidental costs from delivering the service. IMPORTANT The Unit Cost will be transferred to Autotask and will affect profitability calculations. |
Unit Cost |
| Unit Price | The default price you will charge your clients for the service. The price you enter here will override the default price in Autotask every time you click Synchronize with Autotask. | Unit Price |
| Billing Code | For each service, select the Autotask billing code that will be used to determine the tax setting when the service in invoiced. |
- To synchronize the services to Autotask, click Synchronize with Autotask.
The plan services will be transferred to your Autotask site, and the Status will change to Synced.
You can review the transferred services in Autotask > Admin > Features & Settings > Products & Services > Services.
- To modify already synced services, or transfer additional services to Autotask should they become available, click Modify and change the editable fields as needed.
NOTE All services are synced together. You cannot select a single service to be synced.
TIP You can inactivate the services in Autotask once they are synced. For example, if you sell only monthly services, you can inactivate the yearly services.
Your Autotask/Workplace integration is now enabled. You can now create Workplace client teams that are synchronized with Autotask companies.


