PERMISSIONS All users
NAVIGATION Devices
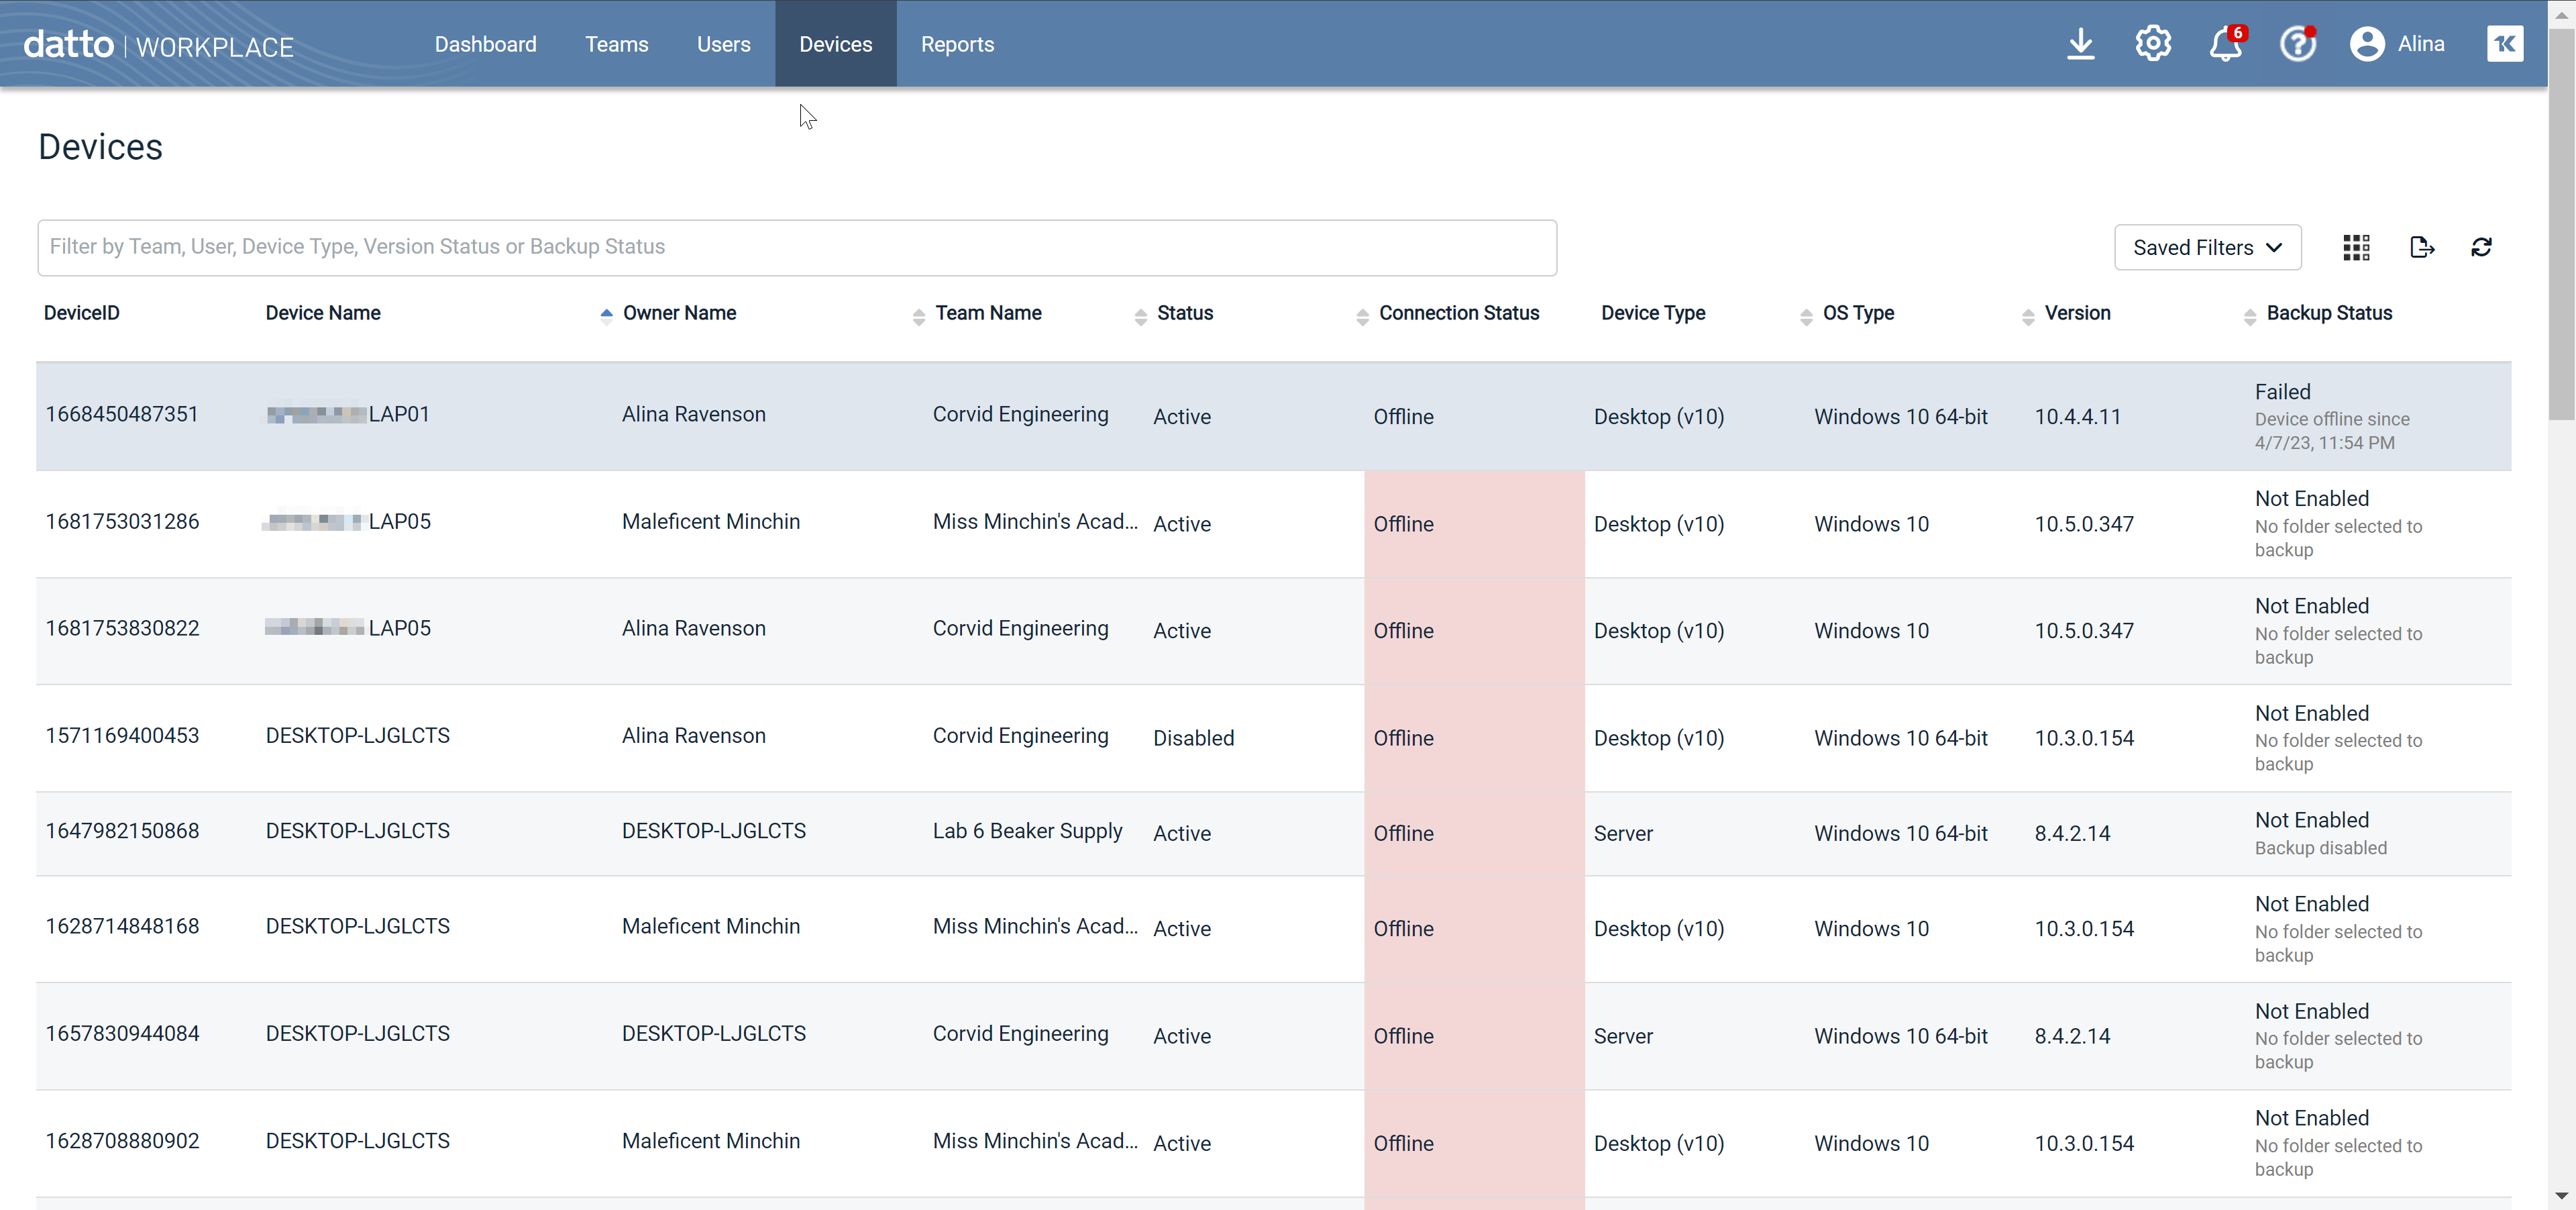
This page allows you to search and view details for devices associated with users. This information is read-only; you cannot edit device details.
You can customize how this list looks using the view selector, filter options, the column chooser, column order, and column sort order. Then you can save the customized view so you can access it quickly in the future. In addition, your saved views can be scheduled to be run as reports and sent to users daily, weekly, or monthly.
Device count restrictions
As outlined in the End User License Agreement, a Workplace user account is intended for use by one person. Users are restricted to a maximum of three active Workplace Desktop installations, three active Workplace Mobile installations, and three concurrent Workplace Online sessions.
Accounts that exceed these Workplace Desktop and Workplace Mobile device counts will be unable to add more devices until devices in excess of the restrictions are disabled or recycled. To recycle or disable a device, simply right-click the device on this page and select Disable or Recycle.
NOTE If there is a valid reason that might justify an exception from these limitations, please contact our Support Team with the User ID for the account that requires additional devices in an active state. We will assess potential exceptions on a case-by-case basis.
How to...
- To filter the list, type in the filter field and press Enter, or click in the filter field and select a filter type, then select a filter value from the available options or enter a filter value. You can add as many filters as you wish.
- To remove the search filter, click the x associated with the filter.
- Click the
 icon on the toolbar of the list. This will open the column chooser.
 - Select the check boxes corresponding to the columns you want to display. The device list will update automatically.
NOTE Workplace will remember the selections you've made, but you can change the configuration of the page any time you want. This provides you with a powerful administration tool that allows you to track the precise status of all your team's devices.
Click the up or down arrow next to a column heading to sort items in ascending or descending order.
Re-order columns by dragging and dropping the column header to a new location.
- Customize your view of this list using filters, the column chooser, drag and drop column order, and/or column sort order.
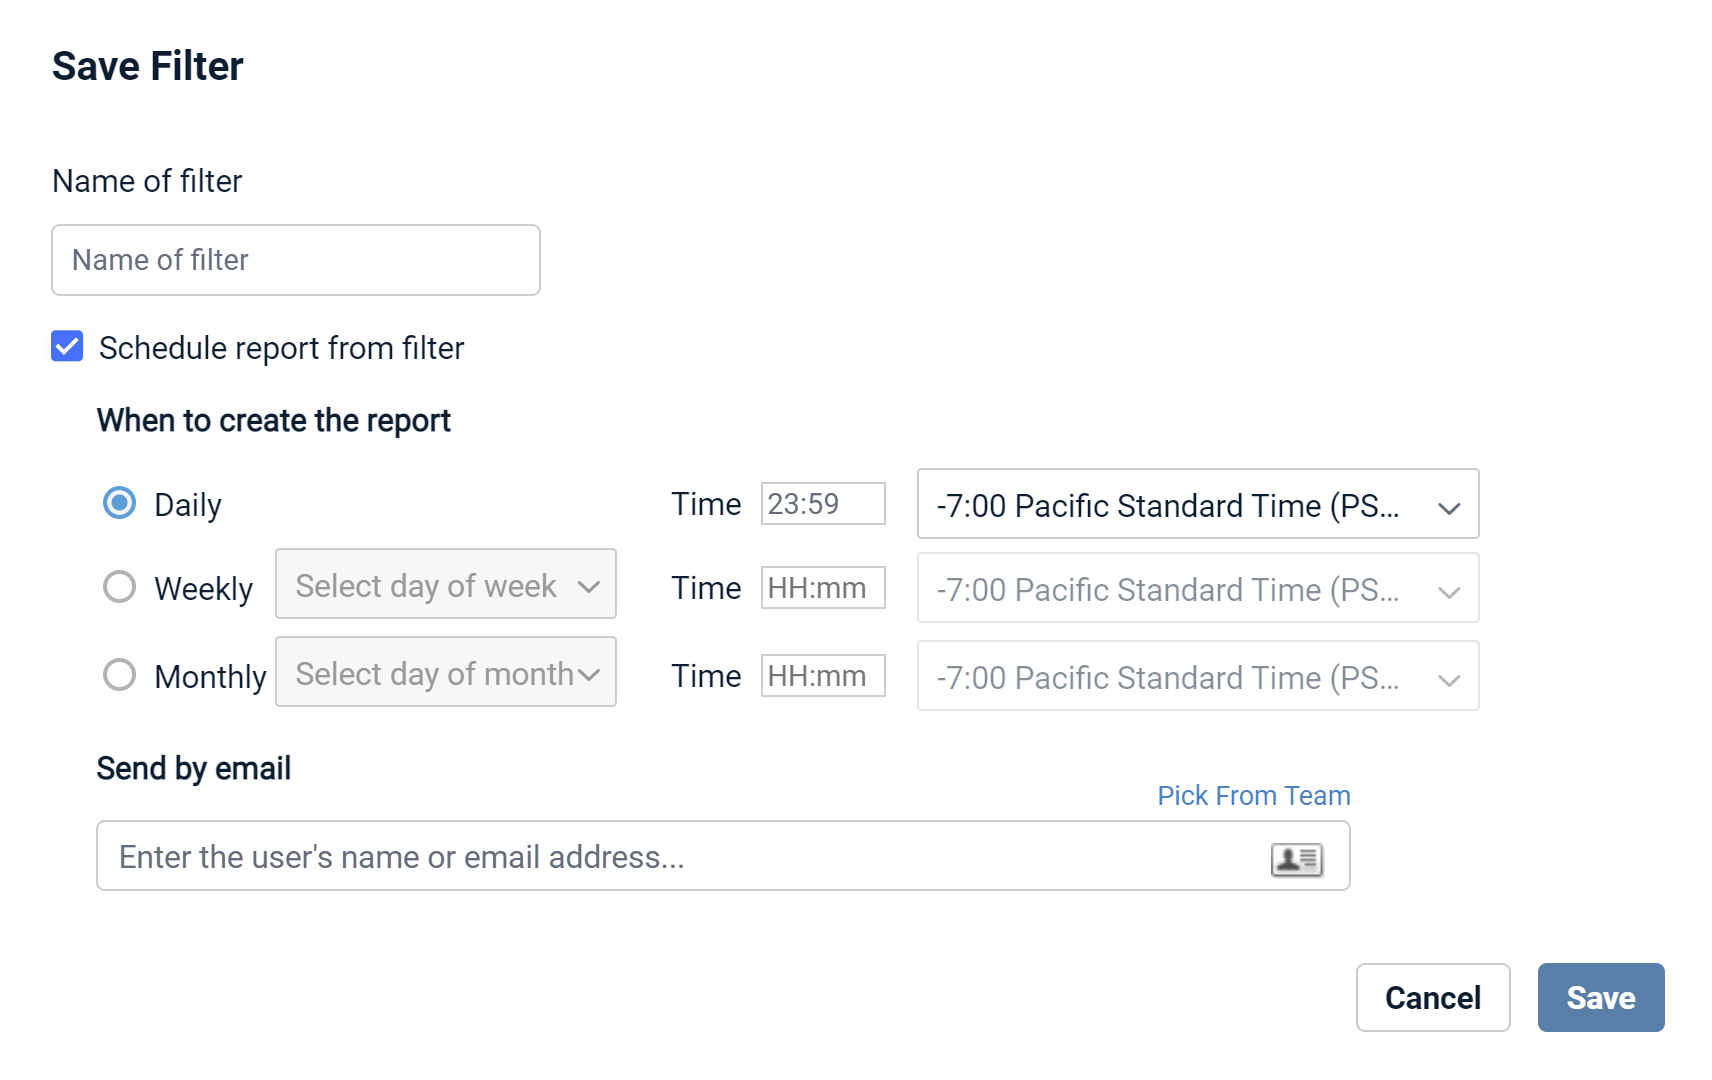
- Click the Saved Filters button and select Save current filter. This will open the Save Filter popup:

- Enter a name for your filter.
- Optionally, select the Schedule report from filter check box. If you do not wish to schedule the report, skip to step 6.

- Complete the scheduling fields as follows:
| Field | Definition |
|---|---|
| When to create the report (Daily, Weekly, Monthly) |
Select a radio button to set the report occurrence frequency. If you select Weekly, you must also select a day of the week. If you select Monthly, you must also select a day of the month. NOTE If you select a day of the month that the month does not contain (for example, a report scheduled to run on the 31st of every month will eventually run in February, which only has 28 days), the report will run on the last day of the month in that instance. |
| Time | Enter the time at which the report should be generated in HH:mm format. This field using a 24-hour clock rather than AM/PM. If you wish to schedule a report for 2:00 PM, for example, you would enter 14:00. |
| Time Zone | Select the time zone you wish to use for scheduling this report. |
| Send by email | Begin typing the name or email address of the recipient, or click the |
- Click the Save button.
- Click the Saved Filters button.
- Click the name of the saved filter you wish to open.
- Click the Saved Filters button and select the filter you want to schedule as a report.
- Click the
 icon in the upper right corner.
 - Select the Schedule report from filtercheck box.

- Complete the scheduling fields as follows:
| Field | Definition |
|---|---|
| When to create the report (Daily, Weekly, Monthly) |
Select a radio button to set the report occurrence frequency. If you select Weekly, you must also select a day of the week. If you select Monthly, you must also select a day of the month. |
| Time | Enter the time at which the report should be generated in HH:mm format. This field using a 24-hour clock rather than AM/PM. If you wish to schedule a report for 2:00 PM, for example, you would enter 14:00. |
| Time Zone | Select the time zone you wish to use for scheduling this report. |
| Send by email | Begin typing the name or email address of the recipient, or click the |
- Click the Save button.
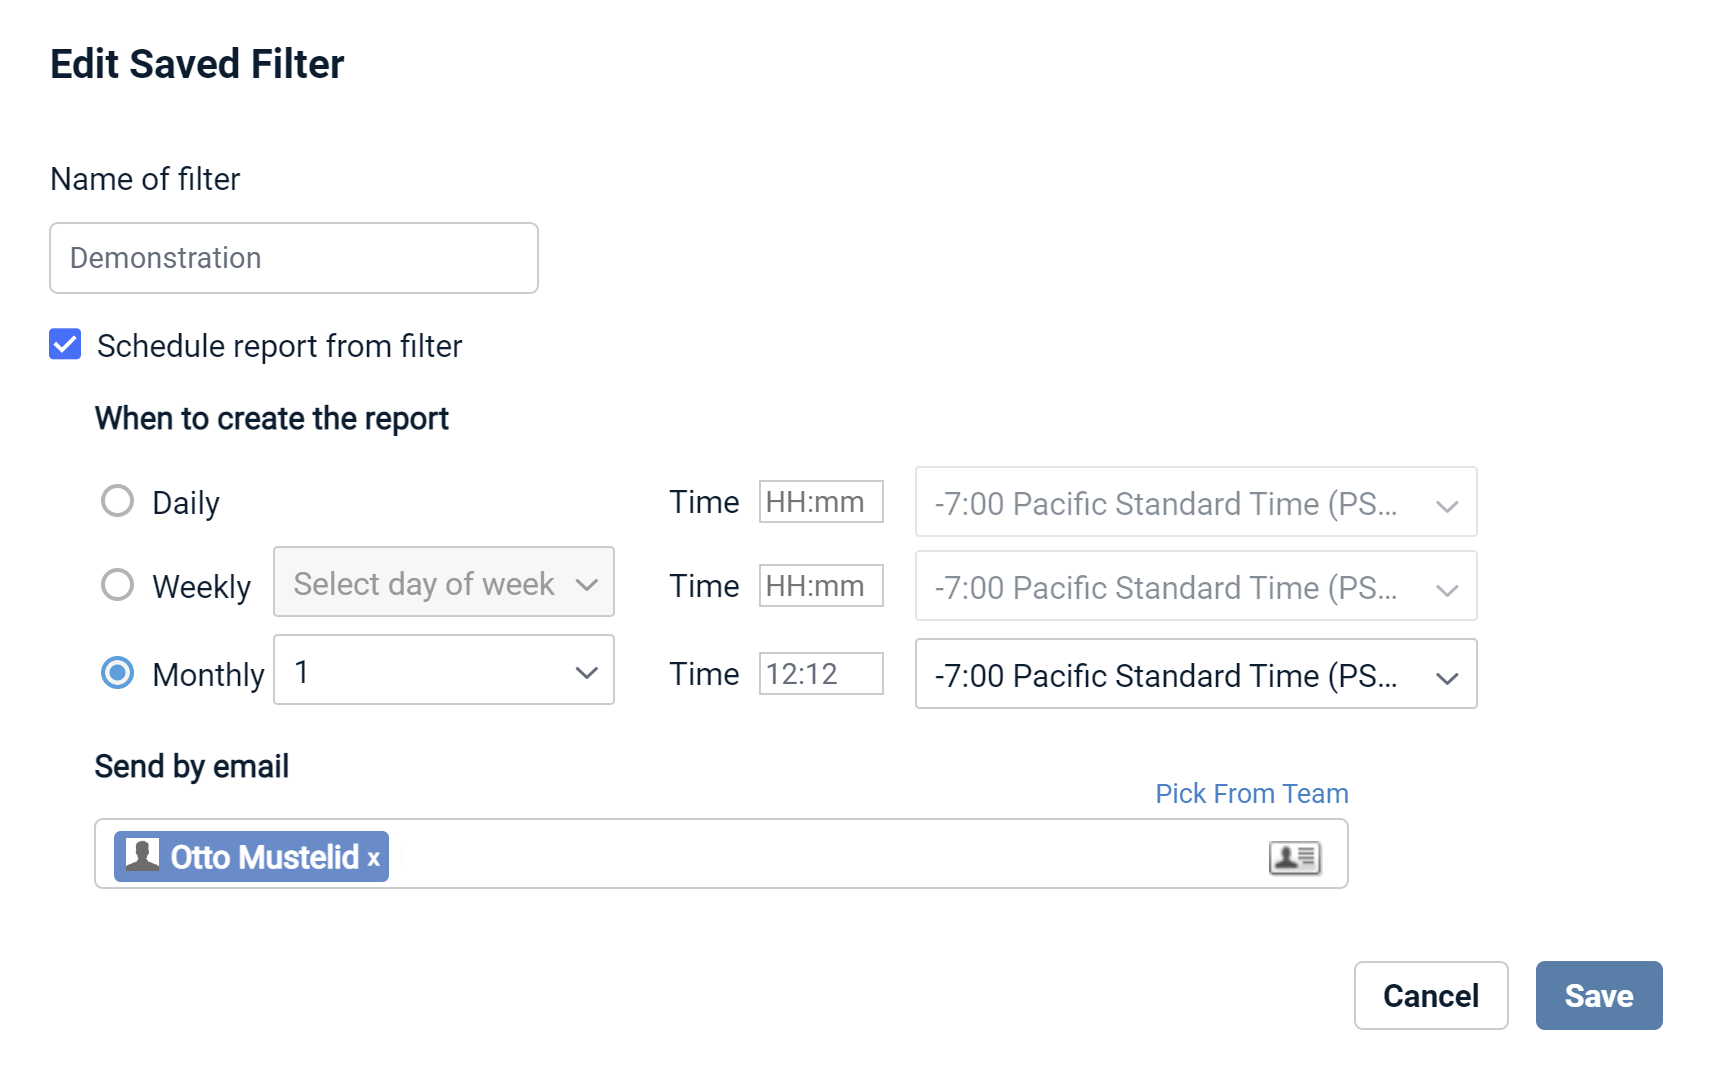
- Click the Saved Filters button and select the report you want to schedule.
- Click the
 icon in the upper right corner.
 - Modify the schedule as needed.
- Click the Save button.
- Click the Saved Filters button and select the filter you want to schedule as a report.
- Click the
 icon in the upper right corner of the report.
 - Click the Delete button in the confirmation popup.
- Click the Export button at the top right of the list.
- Click the CSV button to export to a comma separated file, or the XLSX button to export to an Excel file.
- You may then choose to open the file or save it.
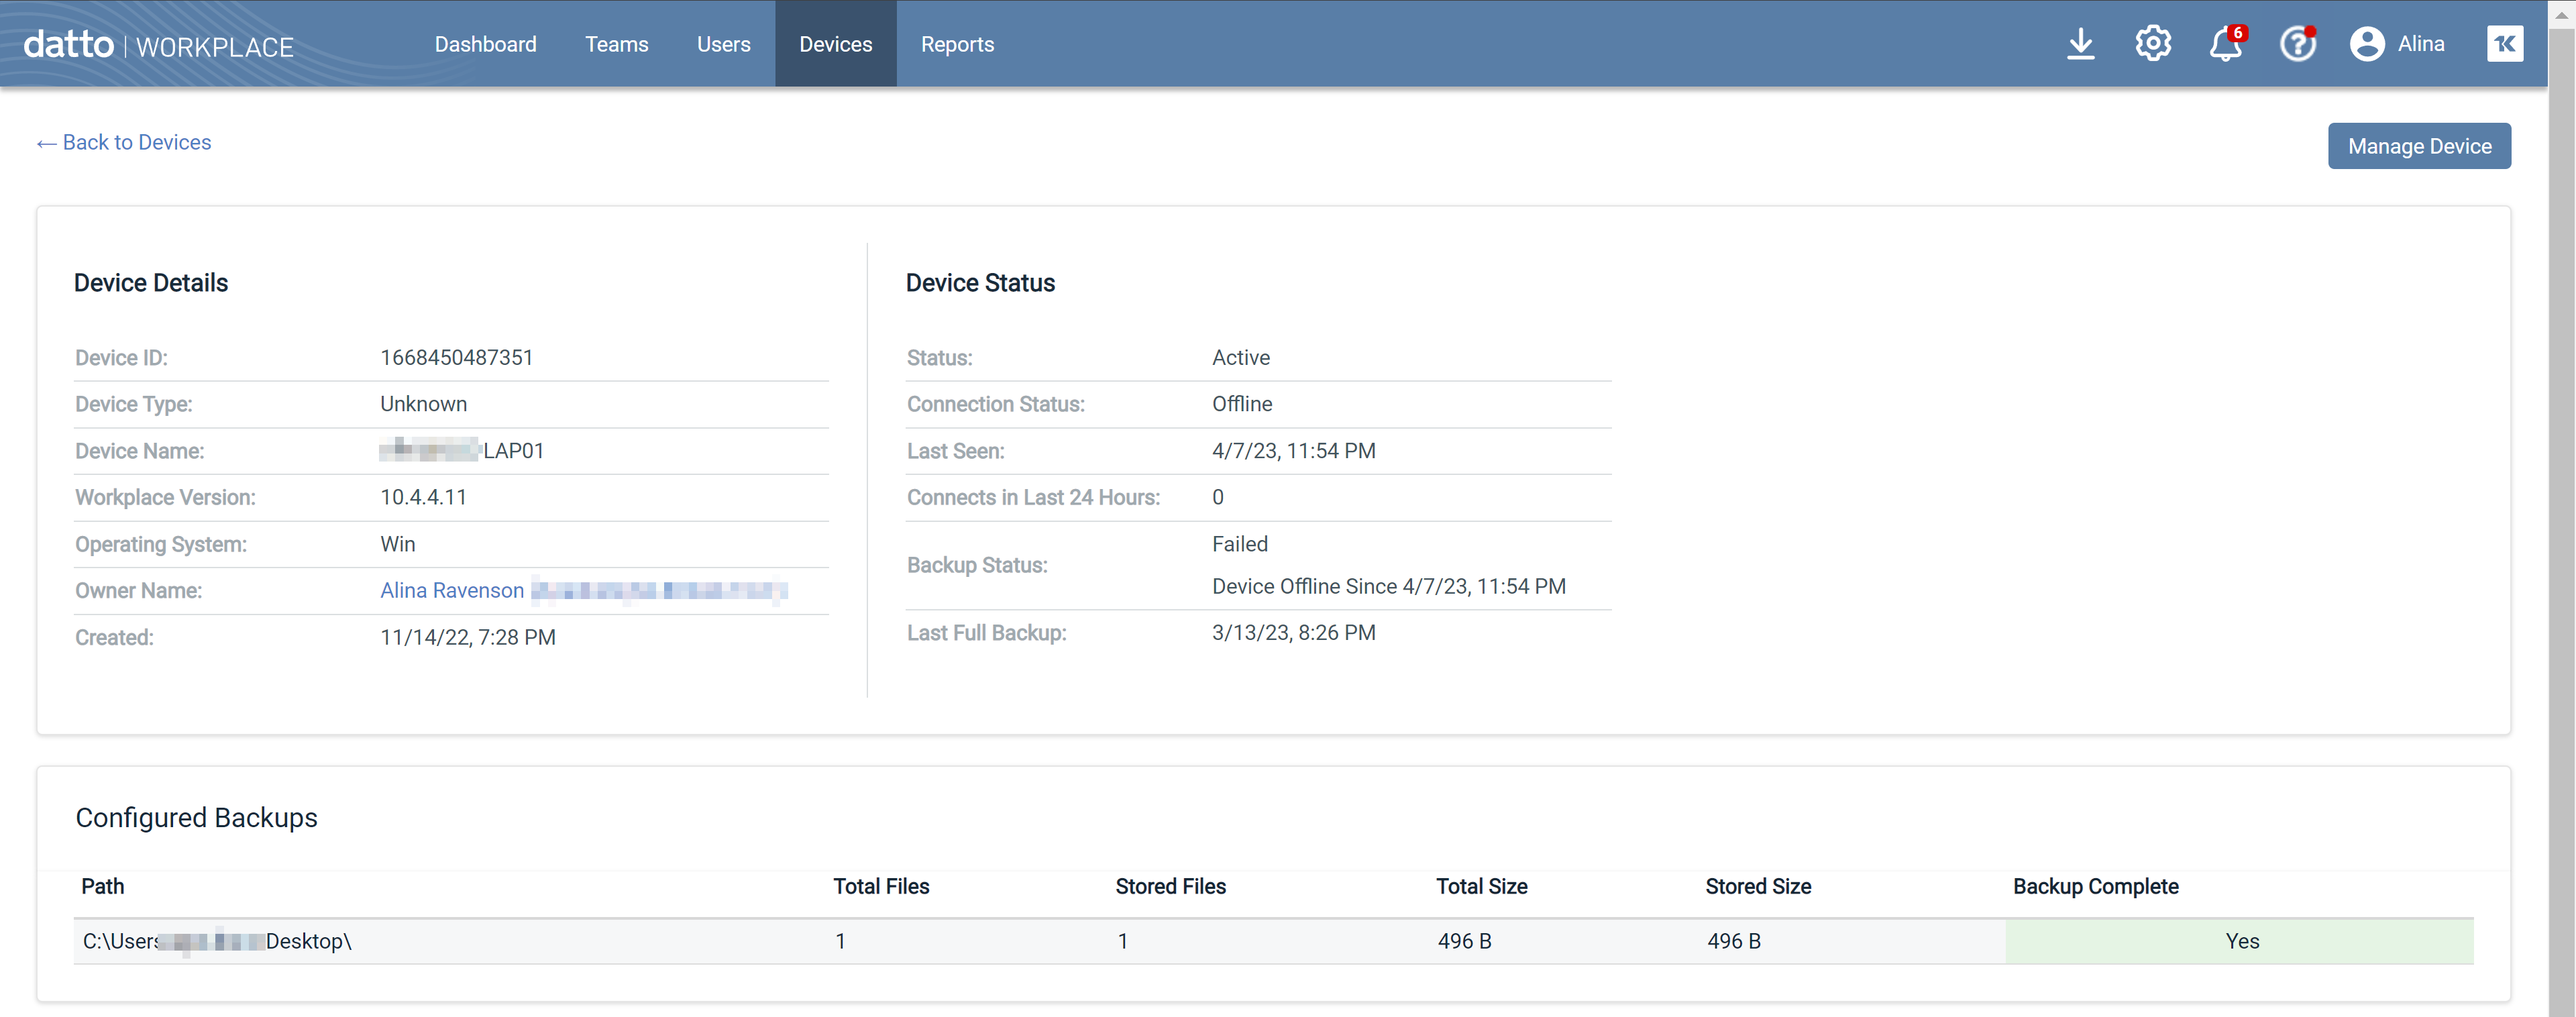
Click on a row in the Devices list. This will open the Device Details page:
When you click the hyperlinked Owner record, the User Detail view opens, with a list of all devices linked to the user.
You cannot edit a device here, only view details and manage files that have failed to back up. To manage a client's devices, click the Manage Device button to open the Device Detail page in Workplace Online.
At the bottom of the page, configured backups for this device are displayed.
- Click a row in the Devices list. This will open the Device Details page. If there are files in a backup status of Backup Failed or Backup Pending Files, they will be listed here.
- Enter a full or partial file ID or name in the filter field. The list will update automatically as you type.
- Click a row in the Devices list. This will open the Device Details page. If there are files in a backup status of Backup Failed or Backup Pending Files, they will be listed here.
- Click the Path link.
- In the small popup, click the path you wish to filter on.
TIP You may filter the path list itself by entering a partial or full path in the field on the popup.
- To remove a path filter, click the X next to the filter item above the list.
NOTE When you exclude a file from backup using this mechanism, the file is placed on the exclusion list on the agent. As a result, if you wish to remove the file from the exclusion list, you must do so through the agent interface. For more information, please refer to the Workplace app Backups tab topic.
- Click a row in the Devices list. This will open the Device Details page. If there are files in a backup status of Backup Failed or Backup Pending Files, they will be listed here.
- Locate the file in the Files Failed area.
- Right-click the file.
- Select Exclude file from Backup.
- Click a row in the Devices list. This will open the Device Details page. If there are files in a backup status of Backup Failed or Backup Pending Files, they will be listed here.
- Click the Export button. This will open an export popup.
- Click CSV or XLSX to choose your export file type.
- You my then choose to open or save the export file.


