March 2016
Autotask is very pleased to introduce several enhancements to Workplace Online in our major service release for Q1 2016.
We have introduced new tools, features and options that enhance security and empowers administrators.
PERMISSIONS You must be an administrator or super administrator to access this feature.
Policy profiles introduce infinite granularity to the Workplace policies by allowing the policies applied to users and groups to be selected. This provides far greater control over the Workplace features and security options.
The policies available remain the same, but the manner in which they are applied to users has been enhanced. Additionally, the policy profiles allow for the default values on user creation to be set, including storage and localization settings.
Accessing Policy Profiles
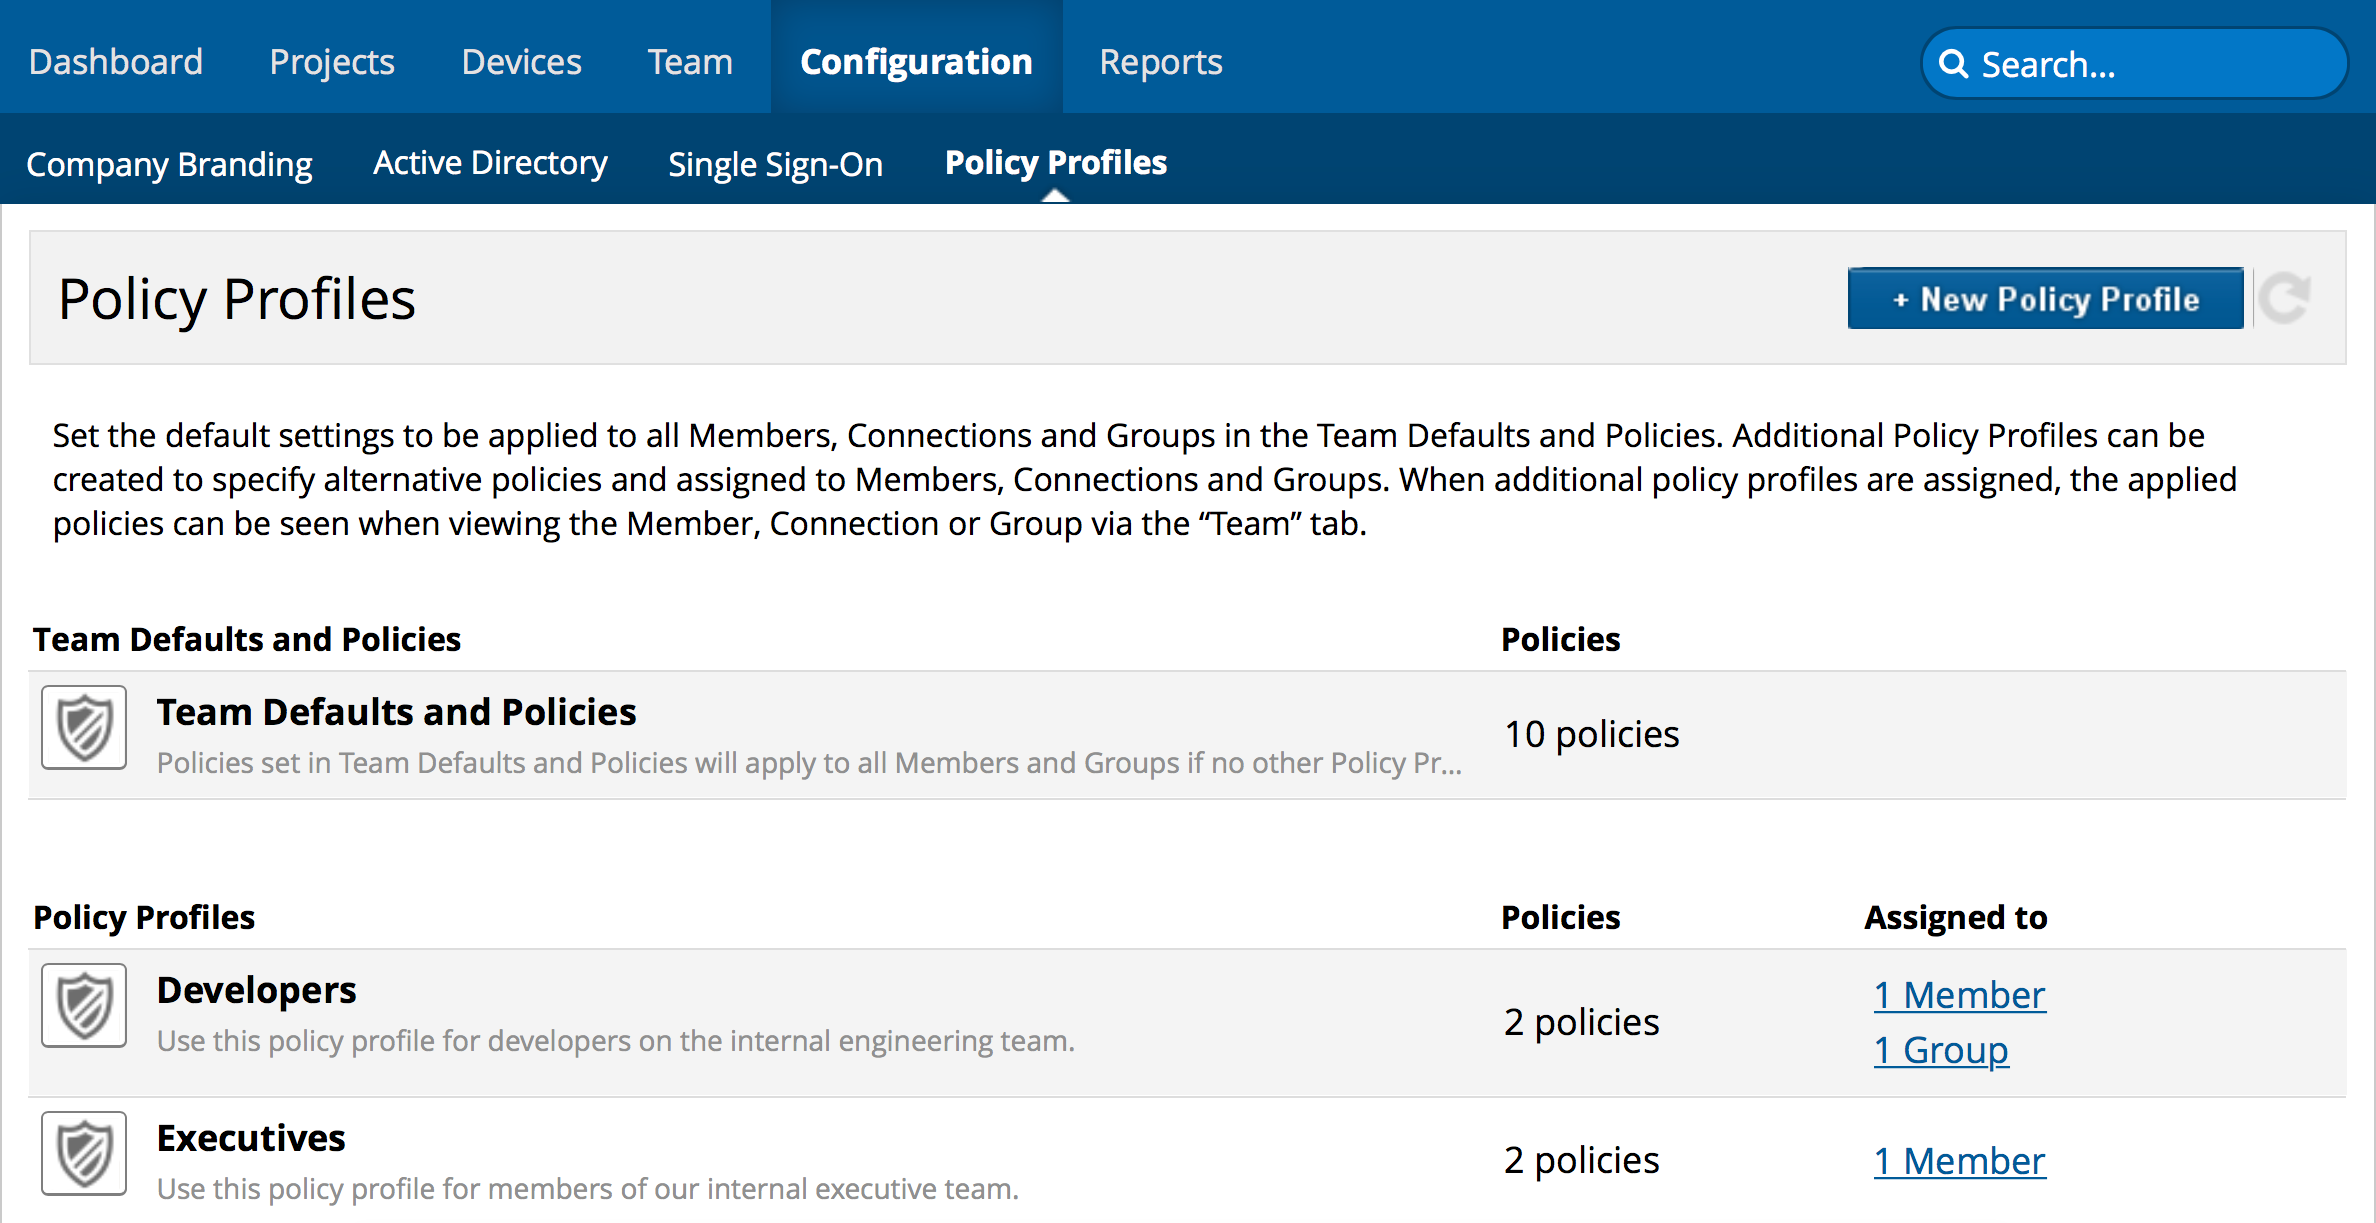
The Policies view has been replaced by the Policy Profiles view.
Understanding Policy Profiles
Any policies set prior to this service update will become your default policy profile.
The default policies are controlled in the Team Defaults and Policies section and apply to all users in the team. Additionally, policy profiles can be created and these will always override the team defaults.
Policy profiles can then be assigned to users or groups. Using this mechanism enables assignment of policy sets on as granular level as required. These policy sets then control the security settings and feature set availability for the team.
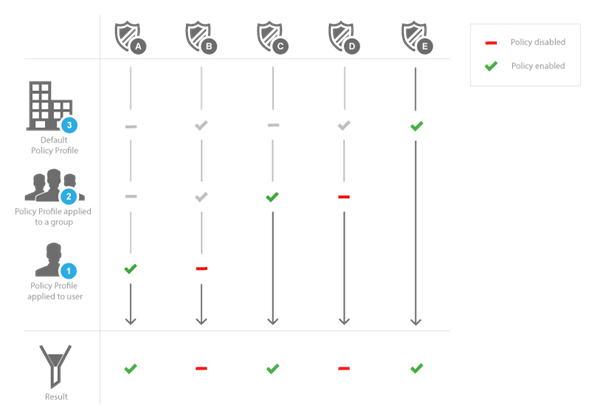
The policies are applied to any individual users in the following order of precedence:
- Default policies are your baseline. If you don’t apply any other policies, these defaults will apply to everyone.
- Policies applied to groups override defaults. Policies applied are additive. When in conflict, the more secure option will take precedence.
- Policies applied to users are absolute. Policies applied as default or to groups will be superseded by policies applied to users.
Setting Team Defaults
The settings on the Team Defaults tab specify the attributes automatically set upon the creation of new users in the team. To change these default values:
- Click Team Defaults and Policies.
- Select the Team Defaults tab.

- Select or enter the values you want to apply when you create new users in the team.
You can set the following default values:
- User Storage
- Country Code
- Country
- Time Zone
- Click Save.
Setting Default Policies
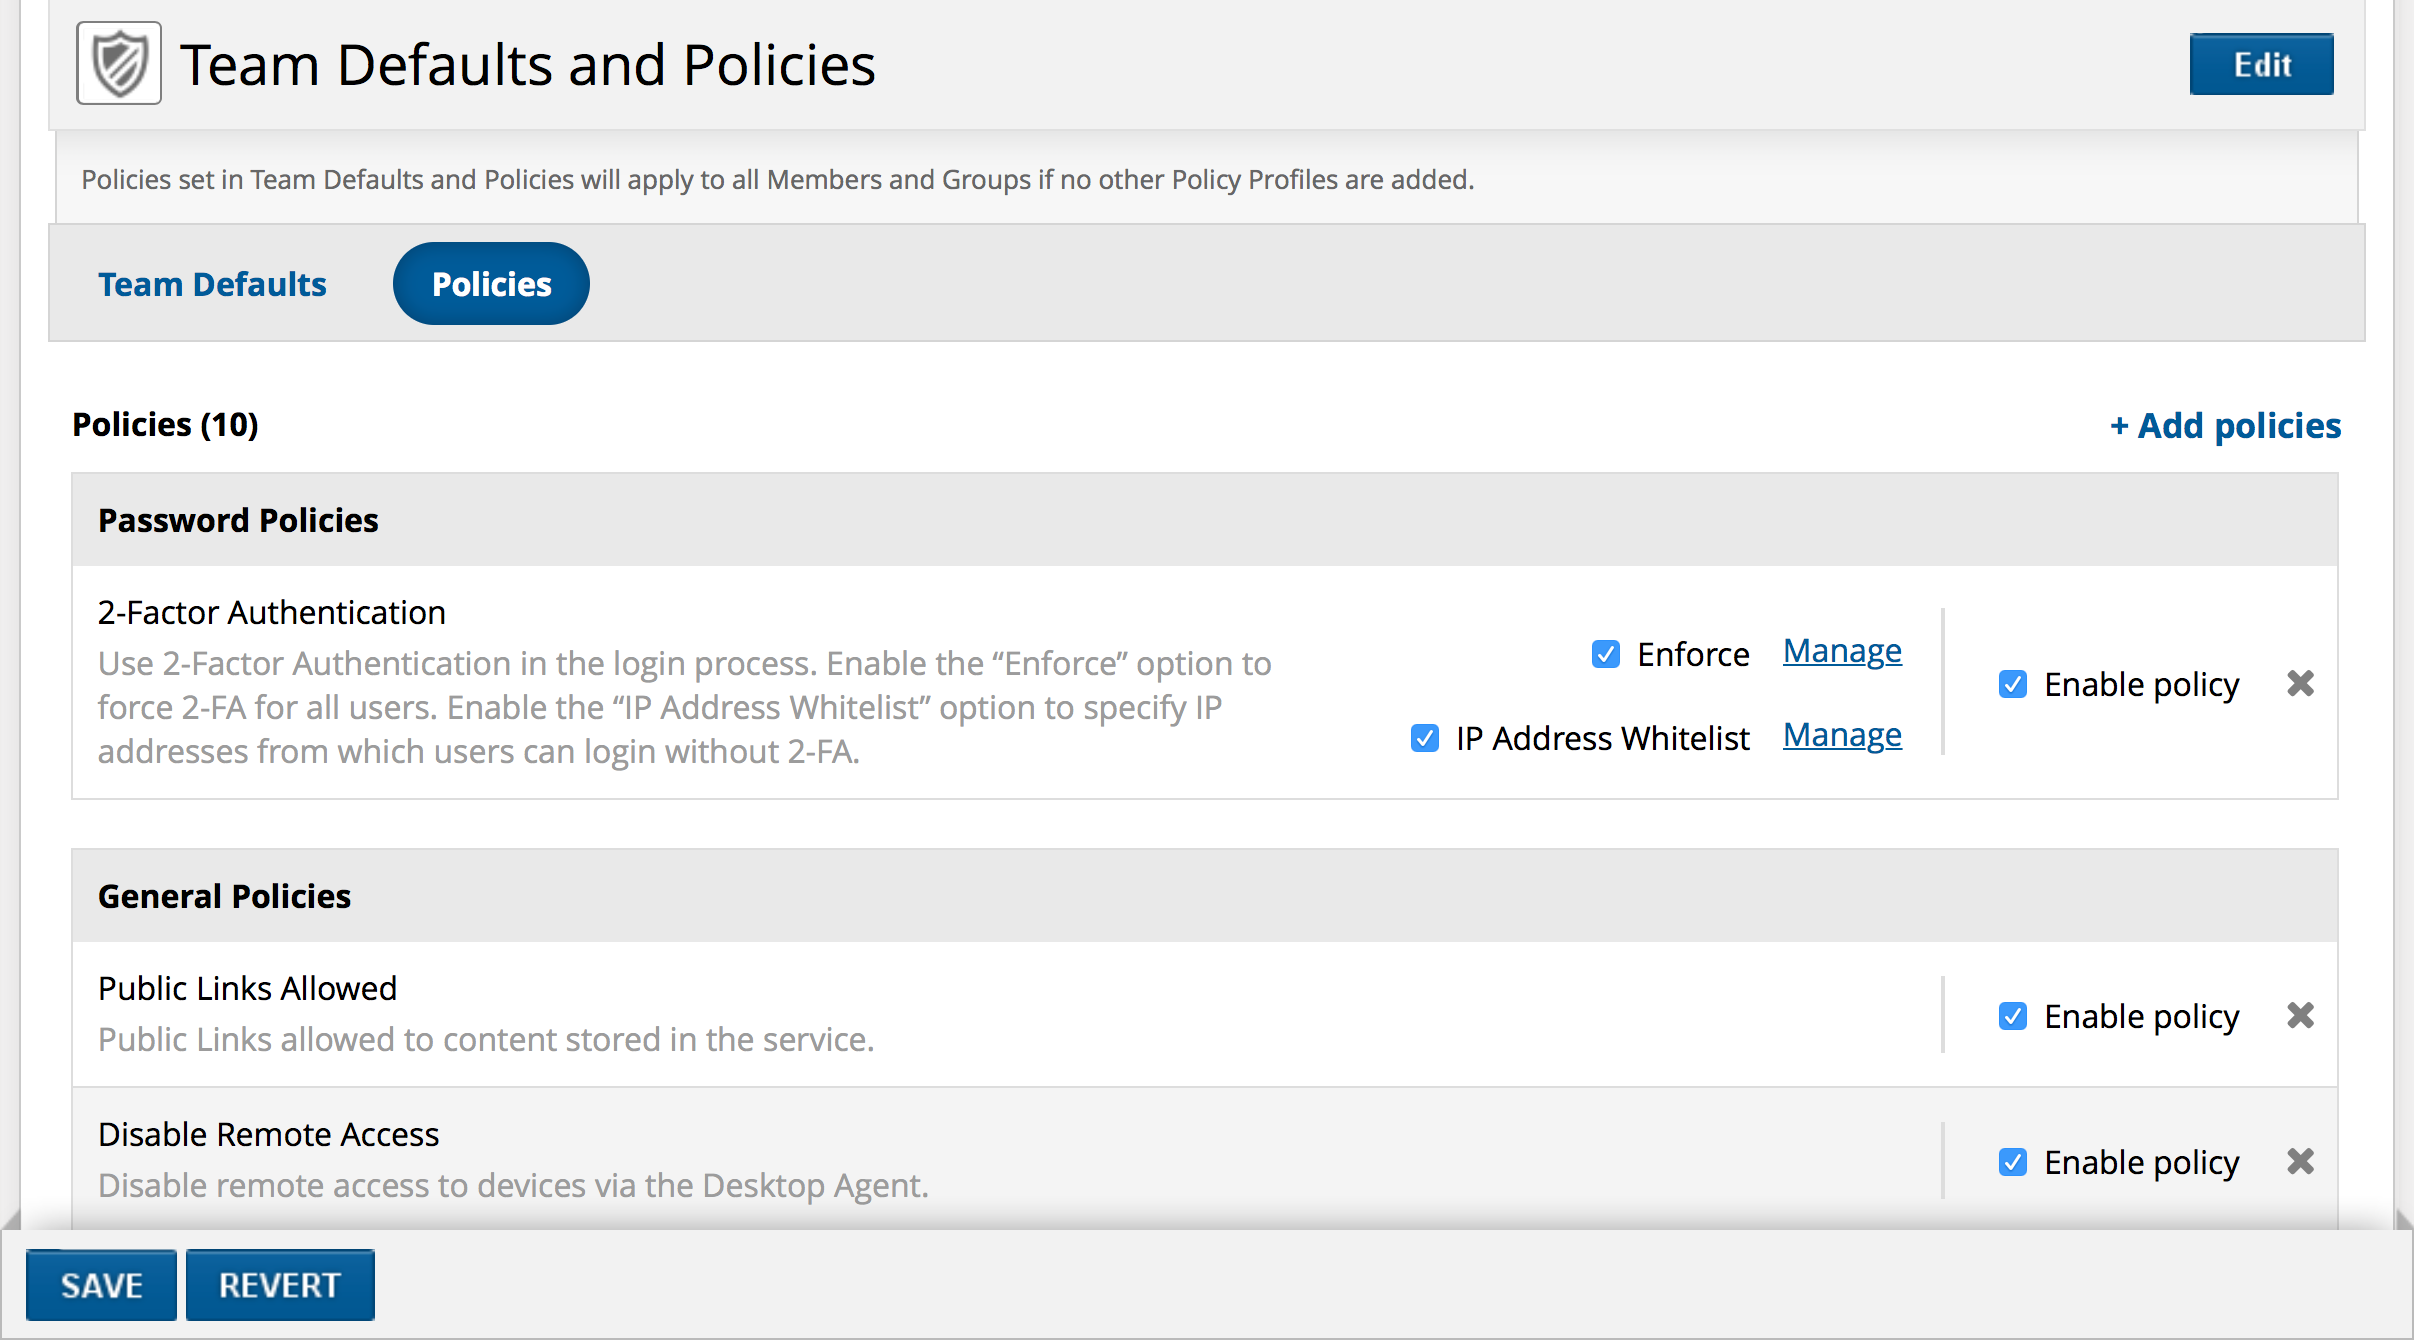
The settings on the Policies tab specifies the policies that apply as defaults to the entire team, unless superseded by a policy profile. To view and change the default policies:
- Click the + Add Policies button to add more policies to your defaults.
- Click the
 icon to remove a policy from your defaults.
 - Toggle the Enable policy check box to enable or disable to policy.
- Where applicable, change the options and settings for the policy as desired.
- Click Save.
Applying Policy Profiles
Applying policy profiles consists of two steps. First the policies are applied to the profile, then the profile is assigned to users and/or groups.
To create and assign a policy profile:
- Click the + New Policy Profile button.

- Enter a name and description for your new profile.
- Click Save. Your new policy profile will appear on the Policy Profiles list.
- Click your new policy.
- Click the + Add Policies button.

- Check the box to enable a policy. If a policy has options, they will become visible once the option is enabled.
NOTE To achieve the desired result when all policies applied to a user are combined, it may be necessary to enable a policy and then click Done. This will add the policy to the profile, which you can then disable to overwrite the default or a policy applied at group level.
- Click Done.
- Click Assigned To.
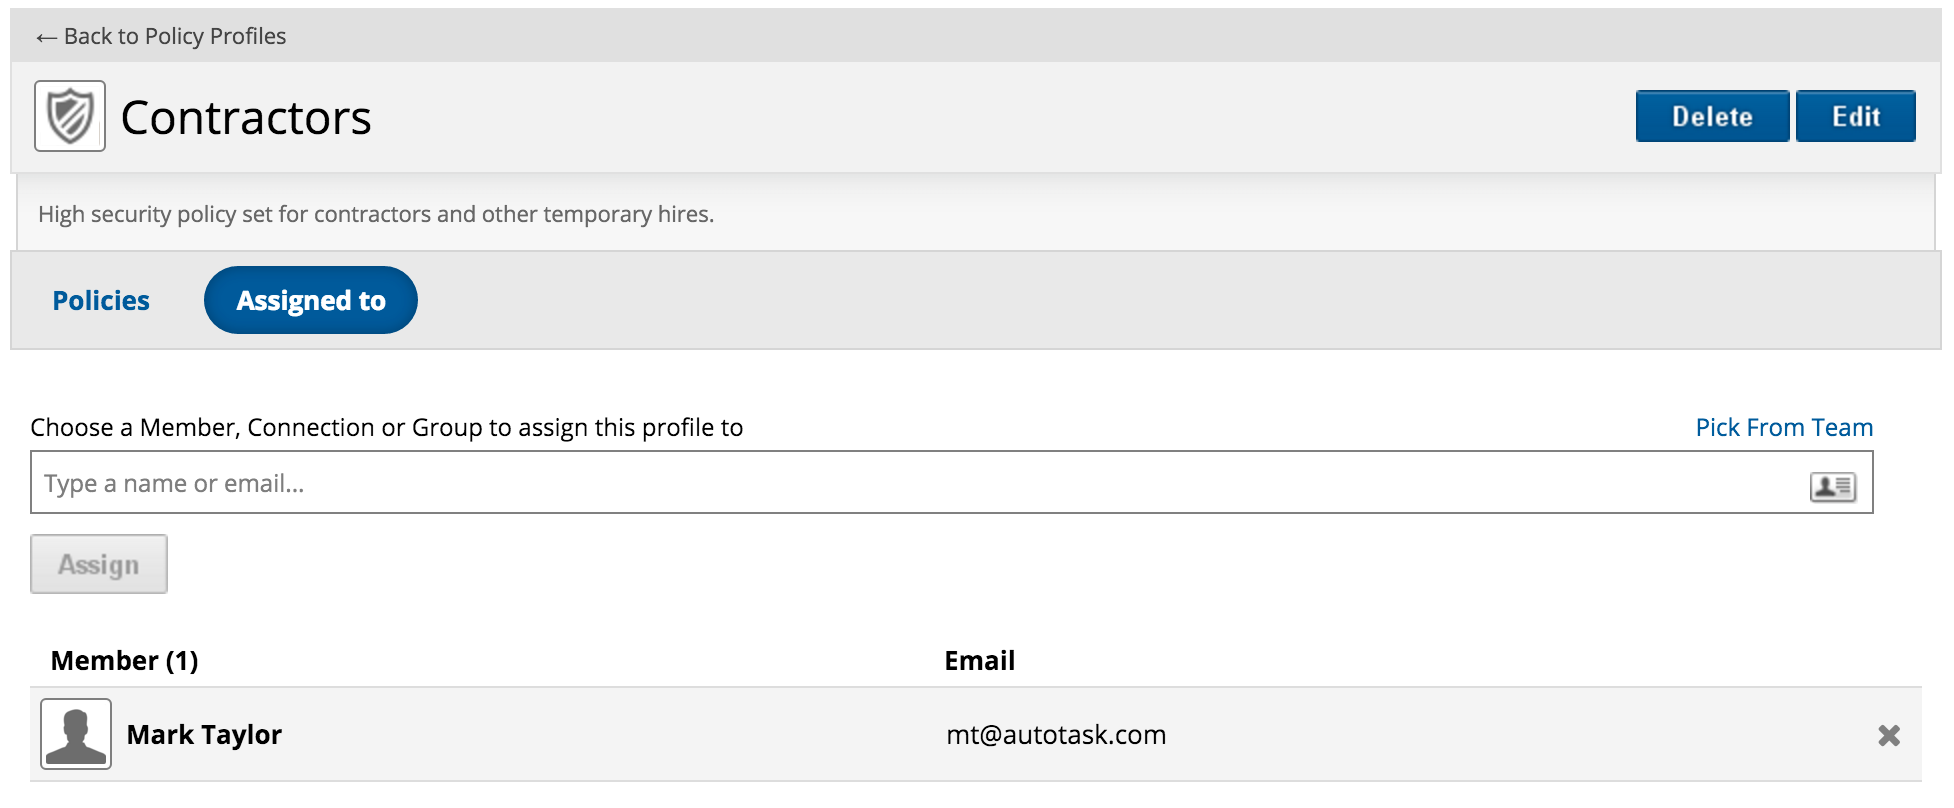
- Add users or groups to which you want to apply your new policy by entering their name or email, or the group name. Alternatively use the Pick from Team button or icon.
Click the icon to remove the policy from the listed user or group.
 - Click Assign.
Administering Policy Profiles
The default policies and policy profiles can be updated at any point by returning to the Policy Profiles tab and clicking on the desired policy. Make the changes and then click Save.
Policies drive a great deal of the security of Workplace, and with a powerful tool it can be difficult to keep track of how the policies are applied when multiple policies are involved. We’ve made it easy to see which policies are applied to all your users and groups so you are confident that your environment is within your security protocols.
Once a policy is applied to a user or group, the Policy Profile tab will become available when viewing that entity via the Team tab. To access this tool:
- Log into Workplace Online.
- Go to Team > Users or Team > Groups.
- Select the desired user or group.
- Select the Policy Profiles tab.
In the top section of this view, all policies applied to the entity (user or group) are displayed. Click + Assign Policy Profile to add to, or the icon to remove from, a policy profile:
In the lower section, a table showing all policies applied to that entity is shown. The first column shows the policy. The second shows the policies applied by the selected policy profile from the drop-down list at the top of that column. The third shows a summarized overview of which policies are actually being applied, taking all policy profiles into account. The Summarized column also displays the name of the policy profile which is causing that policy to be applied:
When removing a policy profile from a user or group, a summary page will also be displayed. This page displays the impact of removing that policy profile from the entity:
The Single Sign-On feature allows for an additional method of authentication when accessing Workplace Online. Once authenticated by the IdP (Identity Provider), the SAML 2.0 protocol is used to authenticate access to Workplace Online.
A user simply needs to login once to the IdP, and can thereafter access multiple applications without needing further authentication.
NOTE The SSO integration allows for an additional authentication method to be enabled. Once this is enabled, the users will still be able to login with their normal Workplace credentials or with Active Directory (if the AD integration in enabled).
Please refer to the Single sign-on integration guide topic in our online documentation for detailed information on SSO implementation.
This feature allows you to revert an entire project or folder to its precise state at a previous point in time. This functions in exactly the same way as our revert feature for files, only it applies to projects and folders.
This powerful feature can be particularly useful in certain scenarios, such as recovering from a ransomware infection.
NOTE This feature is only available to the Project owner
When you revert a project or folder:
- Any deleted files since the revert point will be restored.
- Any changes to files since the revert point will be discarded.
- Any files added since the revert point will be removed.
How to use the Revert feature:
- Log into Workplace Online.
- Navigate to the project or folder.
- More > Manage > Previous Versions.
- Navigate to the desired version.
- From the Actions menu, select Revert.
- Enter your password and confirm the reversion.
- Click Revert.
NOTE All snapshots will continue to exist, even if the snapshot is from a point later than the revert point used in this process. Refer to our help topic on Previous Versions for a complete explanation of the versioning process.
In the Manage Devices area, we’ve added a column chooser, so you can select which columns you want to see. Use this feature to customize your view of your team's device information to display exactly the data you want and to make device administration easier.
How to use the new column chooser:
- Log into Workplace Online.
- Go to Team > Manage Devices.
- Click the
 icon in the upper right corner of the device list. This will open the column chooser:
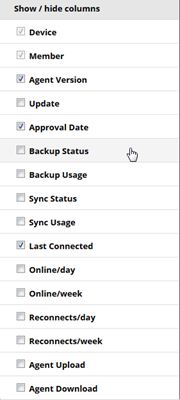
- Select the check boxes corresponding to the columns you want to display. The device list will update automatically.
TIP Workplace will remember the selections you've made, but you can change the configuration of the page any time you want. This provides you with a powerful administration tool that allows you to track the precise status of all your team's devices.
We've improved our file thumbnail views with larger preview tiles and a file type icon. These enhancements will give you a clearer idea of what a file consists of without even opening it:
NOTE Back end conversion improvements in this release will result in faster thumbnail load speeds on all views.
Also, you can now sort your items when you're in thumbnail or list view. To do so:
- Navigate to a project or folder.
- Click the
 icon. This will open the sort popup:
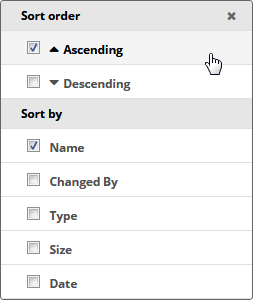
- Check boxes will indicate the current sort order and sort column. To control ascending/descending order, just change the selection. To sort by a different column, select the check box for that column.
NOTE You changes are automatically applied, and Workplace will remember your sort preferences the next time you view the page.
You can now specify which users receive Active Directory alerts, rather than automatically notifying all administrators.
NOTE Notification of all administrators is still the default setting unless you choose to limit the recipients.
How to choose which users will be notified with Active Directory:
- Log into Workplace Online.
- Go to Configuration > Active Directory.
- Scroll to the bottom of the page to see the new Alert Settings area:
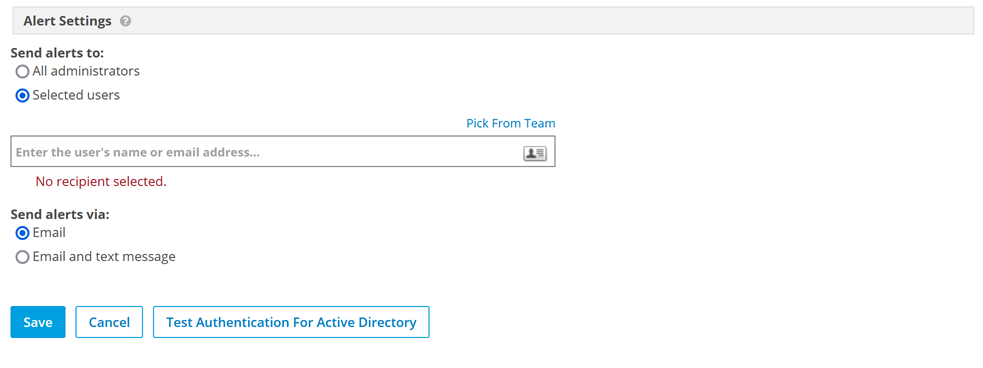
- Select the Notify only selected admins check box.
- Enter the name or email address of an administrator in the Select team admins to notify field, or click the
 icon to use a data selector.
IMPORTANT If you have selected the Notify only selected admins check box and do not select any administrators in the Select team admins to notify field, no one will receive Active Directory alert messages, so it's very important to select one or more recipients.
