PERMISSIONS All users (feature access depends on security level)
NAVIGATION Teams
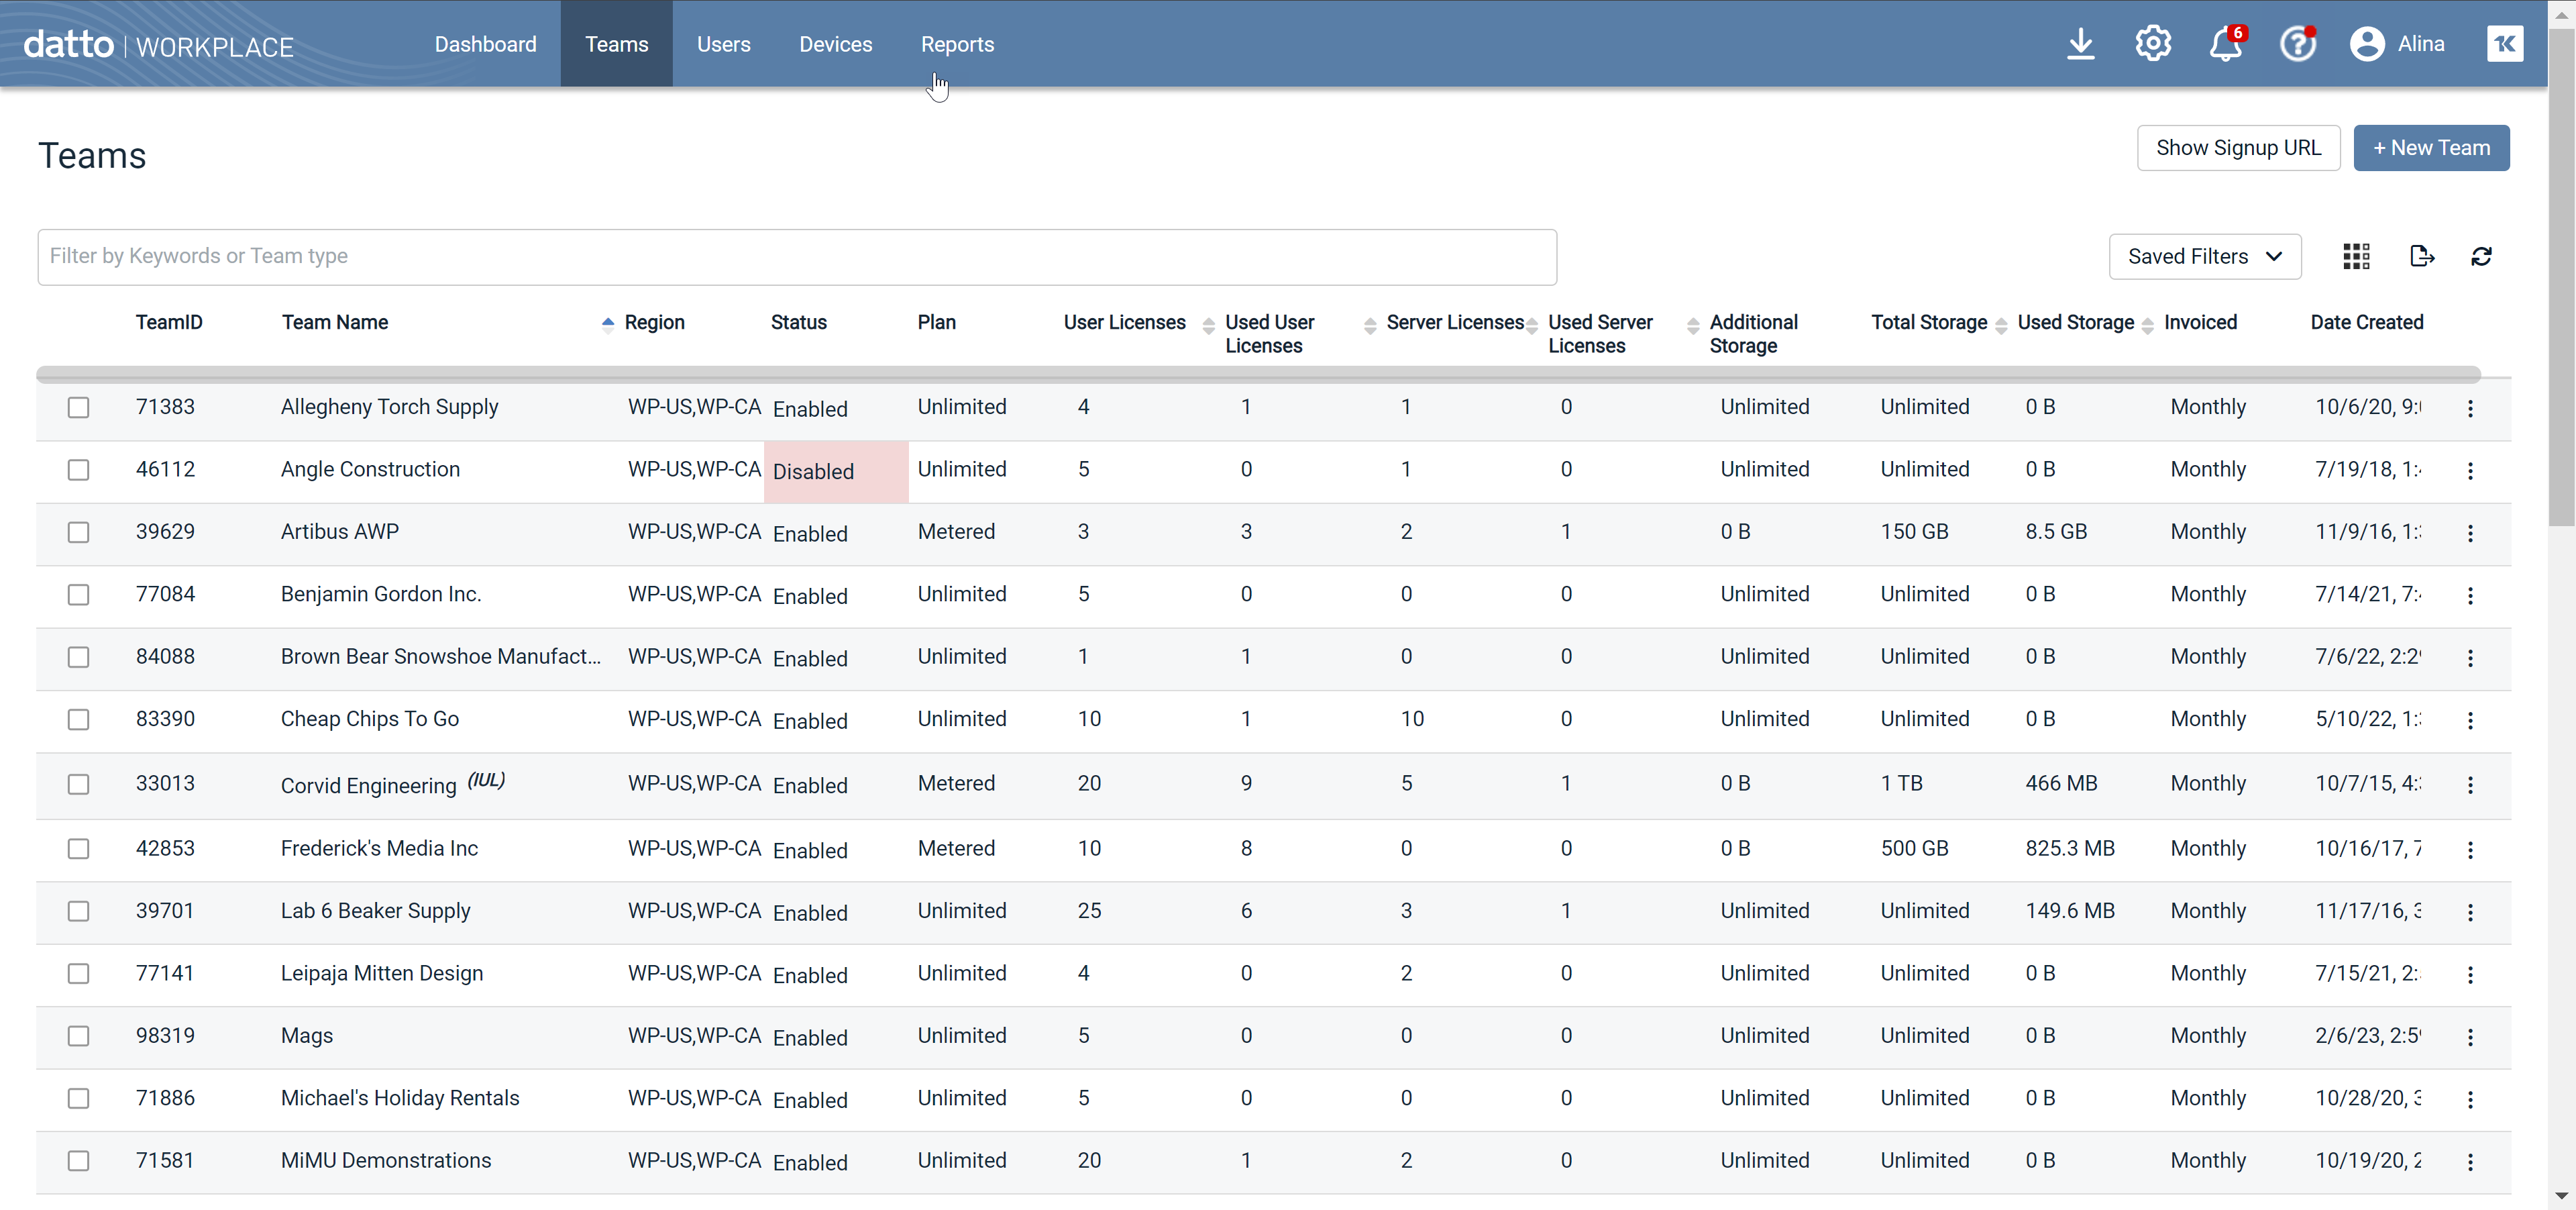
This page allows you to manage your client teams. The list displays information about each team including, but not limited to, ID, name, status, number of licenses, number of servers, storage, and plan.
You can customize how this list looks using the filters, the column chooser, drag and drop column order, and/or column sort order. Then you can save the customized view so you can access it quickly in the future. In addition, your saved views can be scheduled to be run as reports and sent to users daily, weekly, or monthly.
Permissions are determined by your security level. The security levels required to perform specific management tasks are as follows:
|
Permission |
Read Only | Team Access | Full Access |
|---|---|---|---|
| View Team Details |

|

|

|
| Edit Team |
 * * |

|
|
| Manage Team |
 * * |

|
|
| Delete Team |
 * * |

|
|
| Create New Team |
 * * |

|
|
| Export to CSV or XLSX |

|

|

|
| *Restricted to Full Access users for IUL (Internal User License) team | |||
How to...
-
To filter the list, type in the filter field and press Enter, or click in the filter field and select a filter type, then select a filter value from the available options or enter a filter value. You can add as many filters as you wish.
-
To remove the search filter, click the x associated with the filter.
- Click the
 icon on the toolbar of the list. This will open the column chooser.
 - Select the check boxes corresponding to the columns you want to display. The device list will update automatically.
NOTE The system will remember the selections you've made, but you can change the configuration of the page any time you want. This provides you with a powerful administration tool that allows you to track the precise status of all your team's devices.
PERMISSIONS Only Full Access users in Workplace Manager can create an IUL team.
Click the Create New Team button. For more information, refer to Create or edit a team.
Click on a row in the team list or right-click and select View Team Details to open the Team Detail view:
The team details, subscription and utilization information in the top pane, and a searchable list of users in the lower half of the page.
All management options you can access from the right-click menu of the team list can also be accessed on this page.
PERMISSIONS Only Full Access users in Workplace Manager can edit an IUL team.
Right-click on a row and select Edit Team, or open the Team Detail view and click the Edit Team button. Refer to Create or edit a team.
You cannot add or remove users within a client team from Workplace Manager. Instead, you must access the client's Workplace Online site, as described in Manage a client team, and add or remove the user there. Please refer to Add a user for detailed instructions.
PERMISSIONS Full Access or Team Access privileges in Workplace Manager
PERMISSIONS Only Full Access users in Workplace Manager can manage the IUL team.
With the correct security level, you may manage a client team in a version of the client's Workplace Online portal. You do not have access to the client's Files and Devices areas (that is, the data the client is storing in Workplace Online), but they will see the Team, Configuration and Reports menu items that will allow them to manage users and storage.
To access the client's Workplace Online portal, right-click on a row and select Manage Team, or open the Team Detail view and click the Manage Team button.
Refer to Manage end clients.
To return to Workplace Manager:
- Click Back to Workplace Manager in the top right corner.
PERMISSIONS Full Access or Team Access privileges in Workplace Manager. Only Full Access users can delete the IUL team.
- On the team list, right-click on a row and select Delete Team, or open the Team Detail view and click the Delete Team button.
The Delete Teams page opens.
- Enter your password.
- Click Delete.
NOTE Deleted teams will be placed in a "deleted" state but retained for 90 days, after which the team will be deleted automatically and permanently.
TIP To find deleted teams that have not been permanently removed, filter the team list to display only deleted teams. To re-enable a deleted team, go to the Create or edit a team page for that team and select the Team Enabled check box.
- Customize your view of this list using filters, the column chooser, drag and drop column order, and/or column sort order.
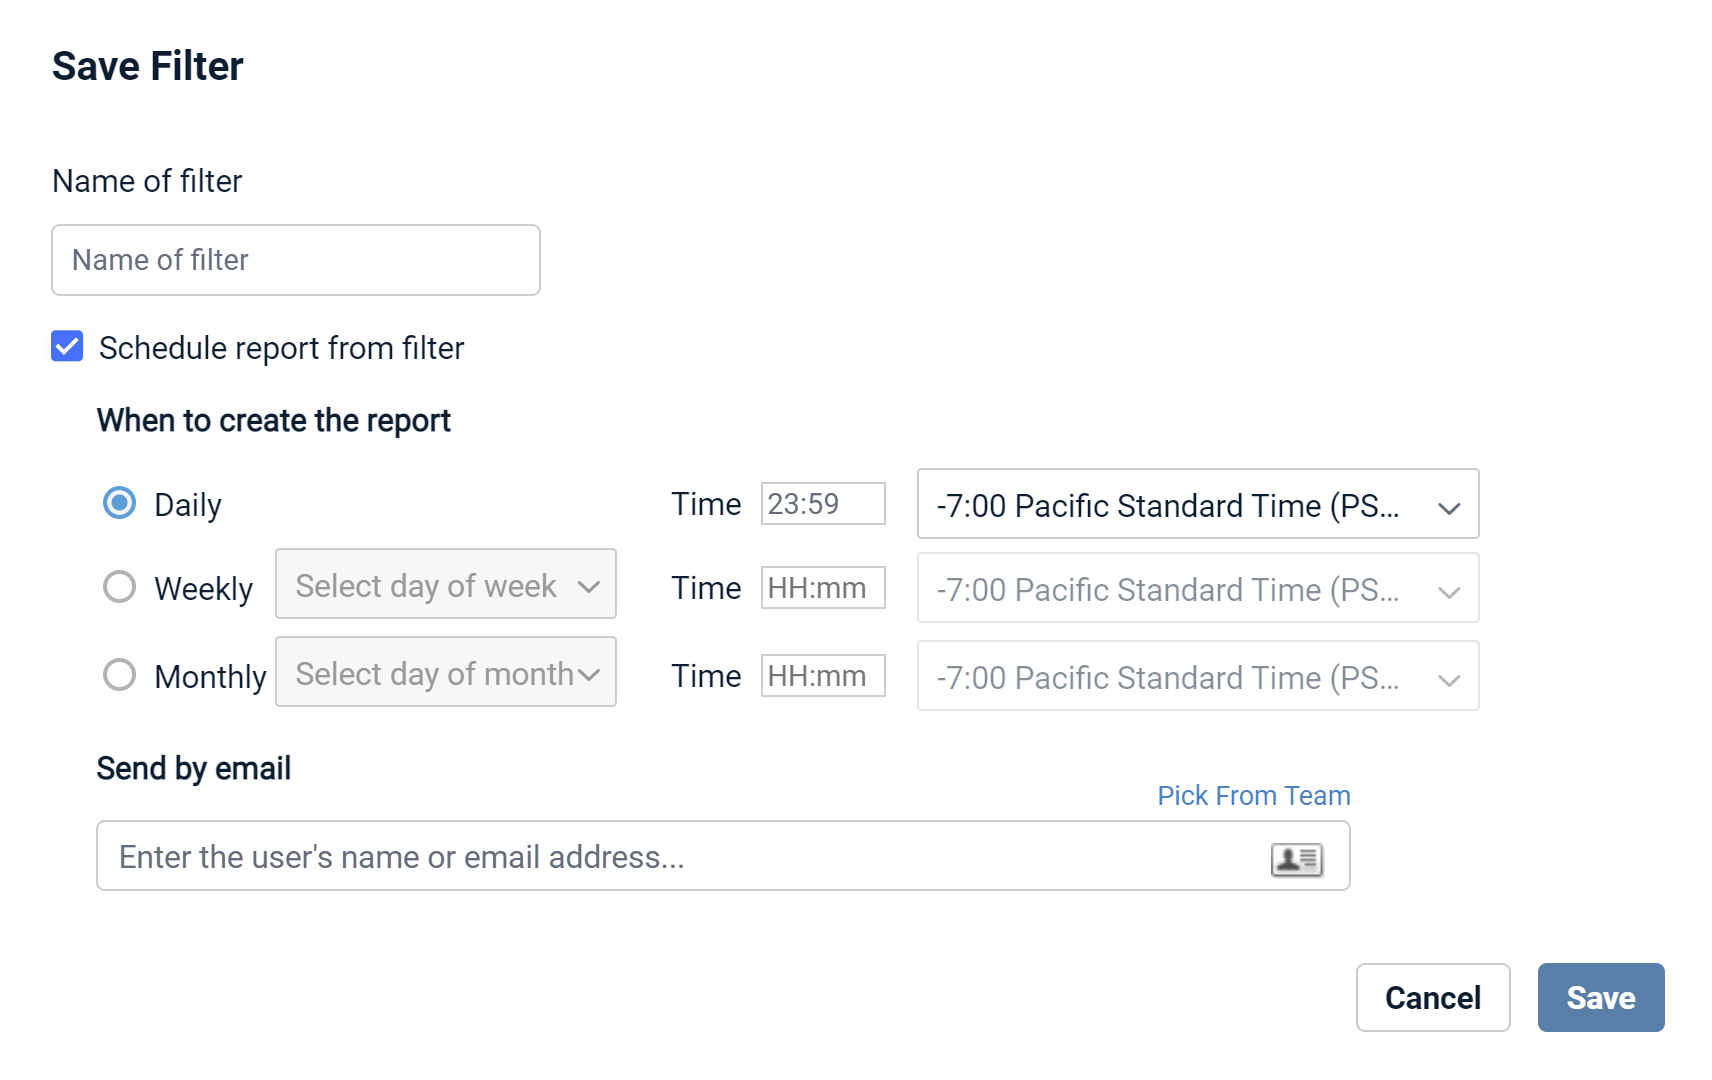
- Click the Saved Filters button and select Save current filter. This will open the Save Filter popup:

- Enter a name for your filter.
- Optionally, select the Schedule report from filter check box. If you do not wish to schedule the report, skip to step 6.

- Complete the scheduling fields as follows:
| Field | Definition |
|---|---|
| When to create the report (Daily, Weekly, Monthly) |
Select a radio button to set the report occurrence frequency. If you select Weekly, you must also select a day of the week. If you select Monthly, you must also select a day of the month. NOTE If you select a day of the month that the month does not contain (for example, a report scheduled to run on the 31st of every month will eventually run in February, which only has 28 days), the report will run on the last day of the month in that instance. |
| Time | Enter the time at which the report should be generated in HH:mm format. This field using a 24-hour clock rather than AM/PM. If you wish to schedule a report for 2:00 PM, for example, you would enter 14:00. |
| Time Zone | Select the time zone you wish to use for scheduling this report. |
| Send by email | Begin typing the name or email address of the recipient, or click the |
- Click the Save button.
- Click the Saved Filters button.
- Click the name of the saved filter you wish to open.
- Click the Saved Filters button and select the filter you want to schedule as a report.
- Click the
 icon in the upper right corner.
 - Select the Schedule report from filter check box.

- Complete the scheduling fields as follows:
| Field | Definition |
|---|---|
| When to create the report (Daily, Weekly, Monthly) |
Select a radio button to set the report occurrence frequency. If you select Weekly, you must also select a day of the week. If you select Monthly, you must also select a day of the month. |
| Time | Enter the time at which the report should be generated in HH:mm format. This field using a 24-hour clock rather than AM/PM. If you wish to schedule a report for 2:00 PM, for example, you would enter 14:00. |
| Time Zone | Select the time zone you wish to use for scheduling this report. |
| Send by email | Begin typing the name or email address of the recipient, or click the |
- Click the Save button.
- Click the Saved Filters button and select the report you want to schedule.
- Click the
 icon in the upper right corner.
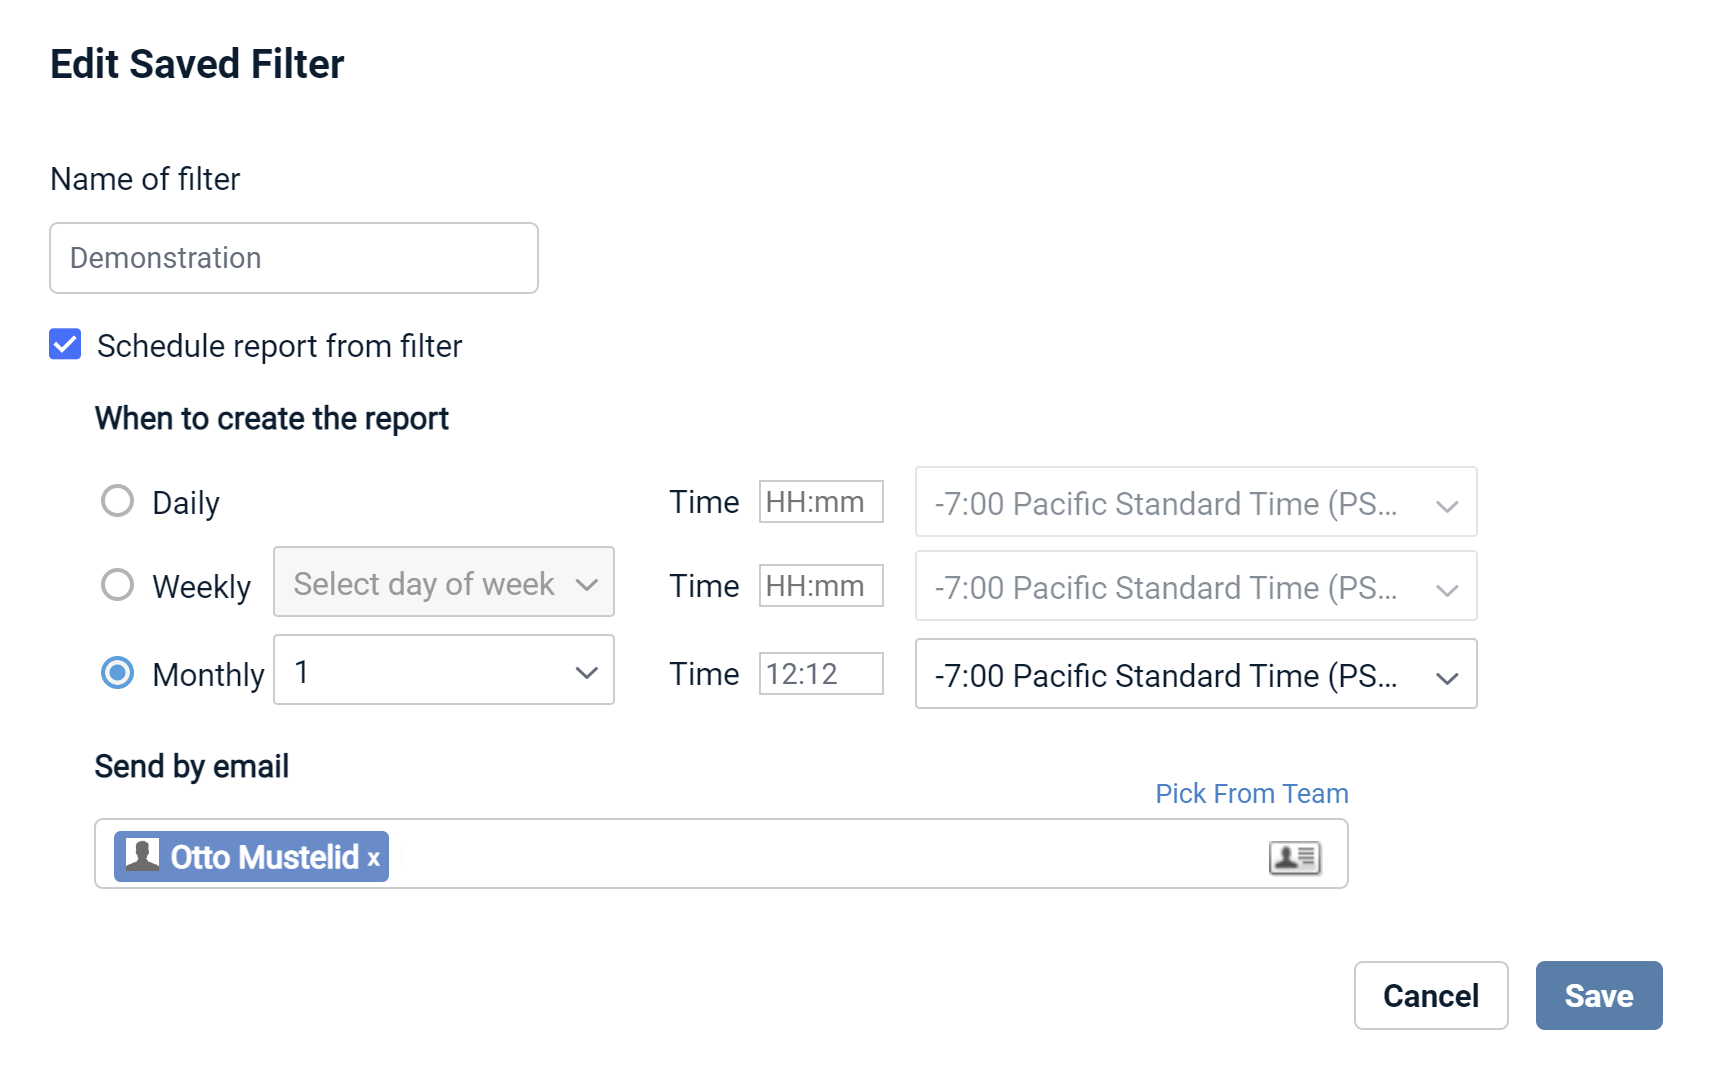
 - Modify the schedule as needed.
- Click the Save button.
- Click the Saved Filters button and select the filter you want to schedule as a report.
- Click the
 icon in the upper right corner of the report.
 - Click the Delete button in the confirmation popup.
- Click Export.
- Select CSV or XLSX.
TIP The CSV option will generate a semicolon delimited .csv file. If your location- or language default is comma-delimited, select XLSX!
- If you selected XLSX (recommended for English-language users, because the CSV file is semicolon-delimited not comma-delimited), the Excel file will open.
If you selected CSV, a semicolon delimited .csv file is generated and downloaded to your computer.
- Click the Show Signup URL button. A popup window displays.
- Click the URL to copy it and add the link to your website, or to your marketing campaigns.
NOTE Trial teams created using this URL will automatically be created under your partner account.


