PERMISSIONS Standard users (limited functionality), Administrators, and Super Administrators
NAVIGATION Workplace Online > Team > Users
Users are simply people who use Workplace. The features and functions to which users have access is determined by their user type. For more information about which functions within Workplace Online are available to which types of users, refer to User types.
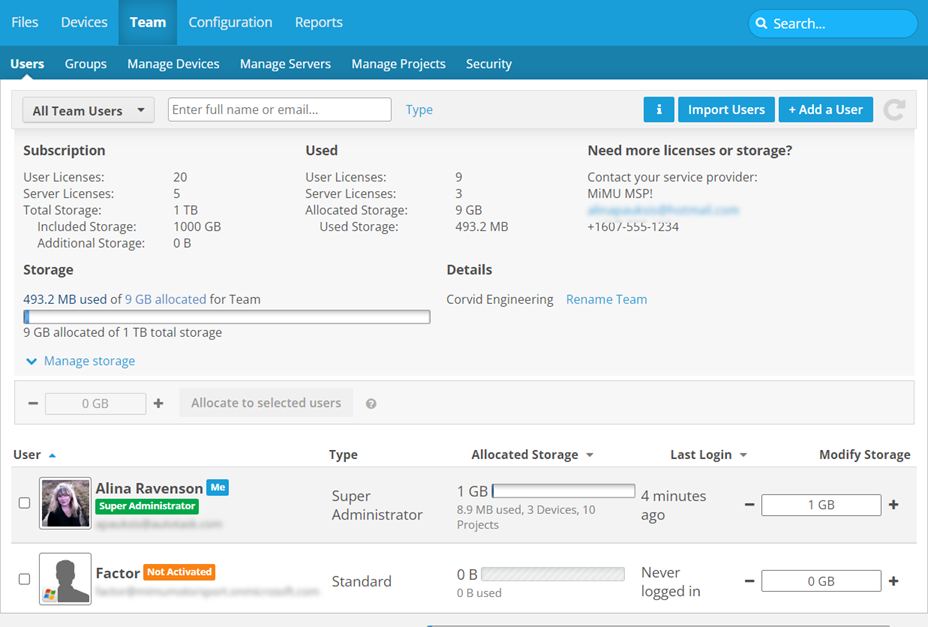
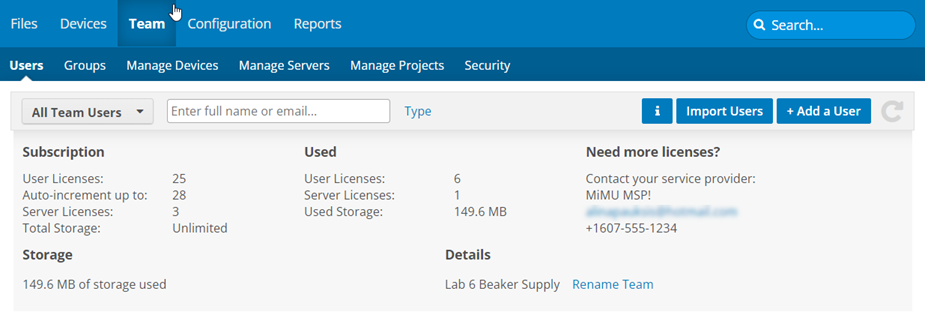
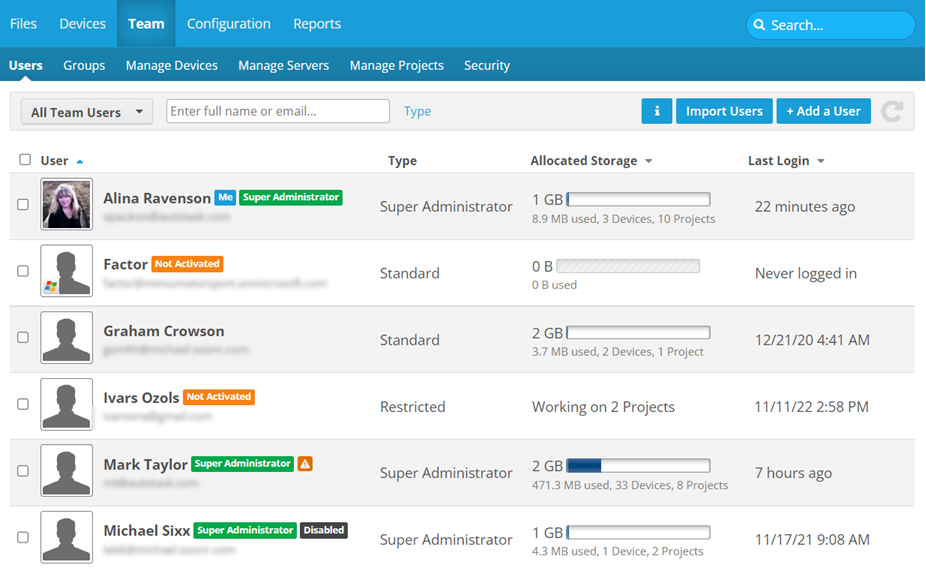
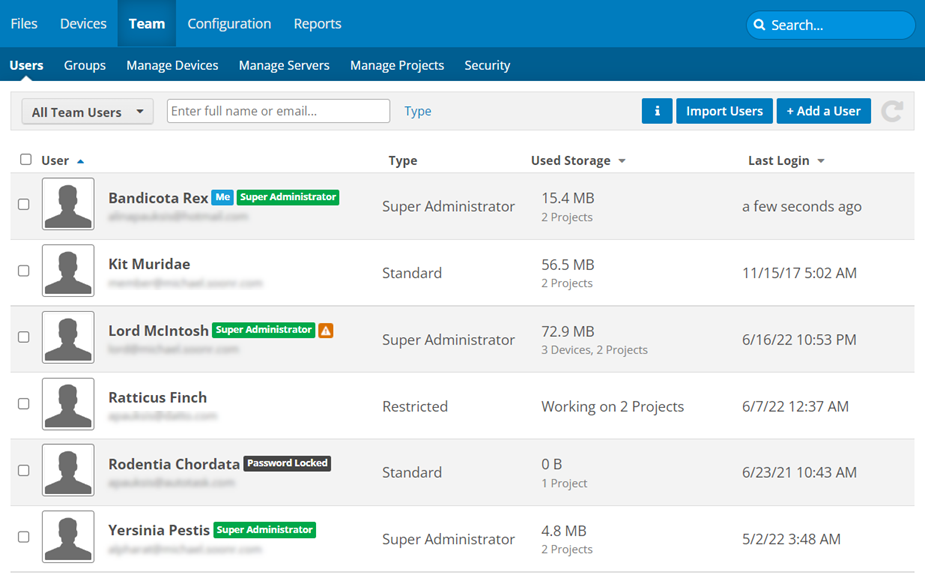
The Users page displays a list of all the users associated with your team, and provides access to a number of user management features detailed in the How to... section below.
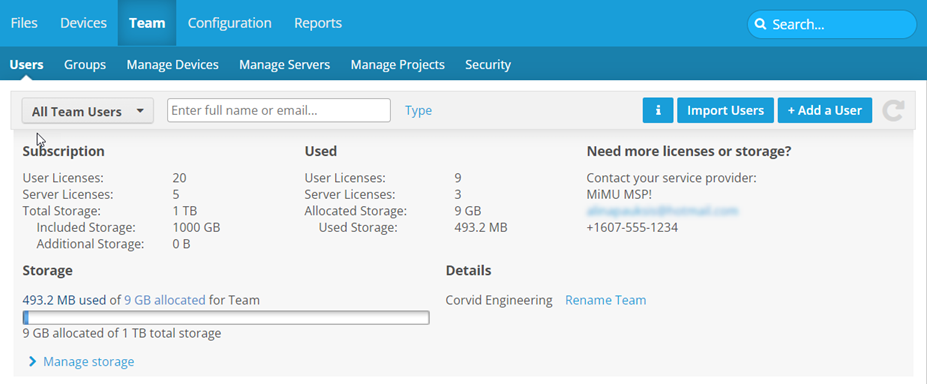
Some details and functionality on this page depend on whether this is a metered or unlimited plan team.
| Metered | Unlimited |
|---|---|
|
|
How to...
Click the user you wish to view. Refer to User details for more information.
Click the up or down arrow next to a column heading to sort items in ascending or descending order.
PERMISSIONS Administrator or Super Administrator privileges in Workplace
- Enter the amount directly or use the +/- icons for each user.
- Select the users whose storage you wish to update, enter an amount in the storage field in the Manage Storage area, and click the Allocate to Selected Users button.
- Click Update.
TIP For more information, refer to Manage team storage.
PERMISSIONS Administrator or Super Administrator privileges in Workplace
The import feature allows you to create several users at once by importing their data from a .csv (comma separated values) file. For details, refer to Import users.
You also have the option of importing new users as copies of an existing user via .csv. For more information about copying new users from an existing user, please refer to Create new users by copying an existing user.
PERMISSIONS Administrator or Super Administrator privileges in Workplace
- Click the +Add a User button.
- Complete the fields on the New User page.
TIP For detailed information for the fields on the New User page, refer to Add a user.
- Click Save.
Use the check boxes on the left side of the user list to select more than one user.
PERMISSIONS Administrator or Super Administrator privileges in Workplace
- Hover over the user record and click the
 icon, or right-click the user record.
 - Select Edit from the menu.
- Update user information as necessary.
TIP For detailed information for the fields on the Edit User page, refer to Edit a user.
- Click Save.
PERMISSIONS Administrator or Super Administrator privileges in Workplace
BEFORE YOU BEGIN Before you can add a user to a group, you must first create the group. For more information, refer to Groups.
- Hover over the user record and click the
 icon, or right-click the user record.
 - Select Add to Group from the menu.
- Begin typing the name of the group, or click
 to select one from a list.
 - Click Add.
PERMISSIONS Administrator or Super Administrator privileges in Workplace
- Hover over the user record and click the
 icon, or right-click the user record.
 - Select Email from the menu.
- A new message form in your default email application will open, with the user's email address already populated.
- Hover over the user record and click the
 icon, or right-click the user record.
 - Select Resend Welcome Email from the menu.
- Click Resend in the resulting popup to confirm.
PERMISSIONS Administrator or Super Administrator privileges in Workplace
Disabling prevents the user from logging in, but the user will continue to consume a license and storage allocated to them.
NOTE You can only disable a user who is currently enabled. You can only enable a user who is currently disabled. You cannot disable yourself.
- Hover over the user record and click the
 icon, or right-click the user record.
 - Select Disable or Enable from the menu.
- Confirm the action.
PERMISSIONS Administrator or Super Administrator privileges in Workplace
NOTE You cannot delete yourself.
- Hover over the user record and click the
 icon, or right-click the user record.
 - Select Delete from the menu. If the user is not a project owner and has no devices associated with them, skip to step 6.
If the user is a project owner, or if they have synced devices associated with them, this page will display: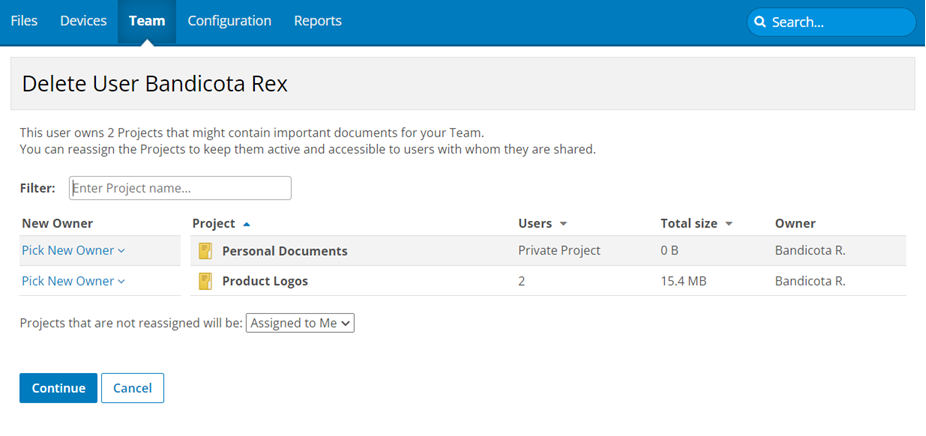
-
For projects:
In the Not reassigned project will be: field, you can choose to assign to yourself all projects that you have not explicitly reassigned, or delete all projects that have not been reassigned.- Select new project owners from the dropdown menus for each project (you can choose yourself), then
- For devices, choose which action you want to take (Wipe or Don't Wipe) for each device associated with the user. When a device is wiped, it is also purged.
- The Delete User page will display:

- Click Continue.
NOTE This page summarizes the actions that will take place when you complete deletion, i.e. project reassignment or deletion, remote device wipe. When a device is wiped, it is also purged.
-
If you have chosen to delete in the previous step, you must select the confirmation check box.
- Click Delete.
PERMISSIONS Administrator or Super Administrator privileges in Workplace
NOTE There are several different ways to copy new users from existing ones. For more information, and to find out which method best suits your needs, please refer to Create new users by copying an existing user.
- Hover over the user record and click the
 icon, or right-click the user record.
 - Select Copy from the menu. This will open the Copy User popup:
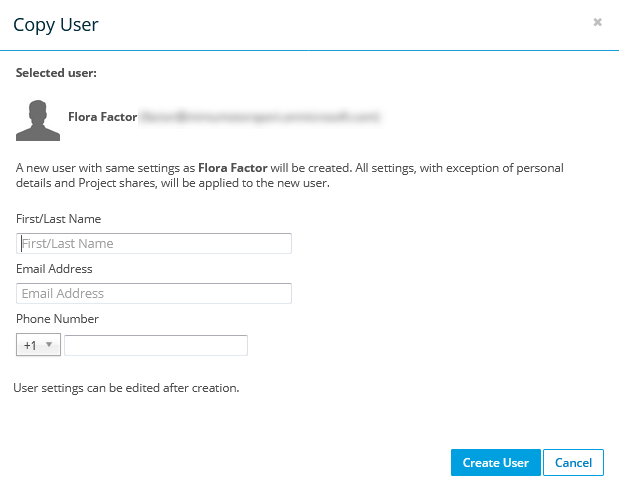
- Enter the full name, email address and (optionally) phone number.
- Click Create User.

 .
.