PERMISSIONS All users
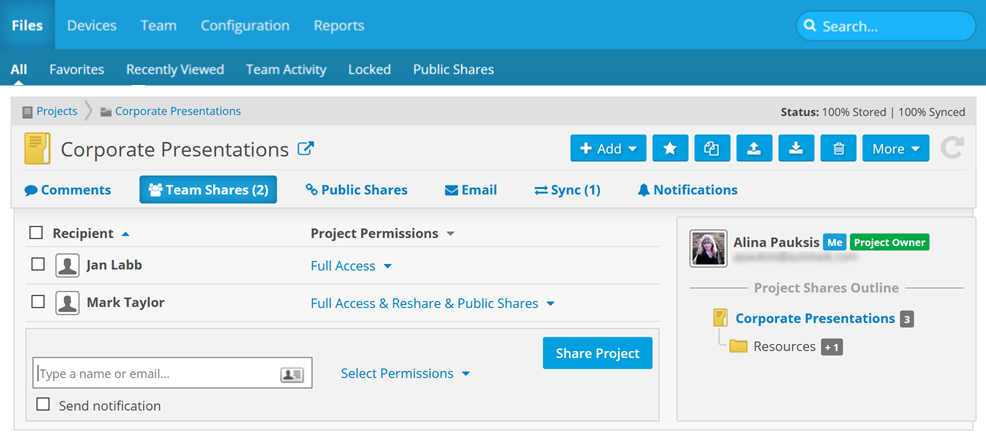
NAVIGATION Workplace Online > Files > click a project, folder, or file > Click Team Shares
Workplace provides granular permissions for sharing within your team that allow you to control who can access your projects and folders, ensuring you data remains safe and secure.
NOTE Project, folder, and file sharing is designed to support collaboration with the other members of your team. To share documents with users outside your team, please refer to Managing project, folder, and file public shares.
When a new project is created within Workplace, the creator automatically becomes the owner of the project and, by default, is the only person who can access the project.
Projects must be shared before other users on the team can access the contents of that project.
IMPORTANT Projects must be shared with a specific Workplace server before they can be synced to that server.
IMPORTANT Projects must be shared with a file sharing integration before they can be accessed through that integration.
The following levels of permission are available:
|
|
Online View Only1 | Read Only | Modify | Create & Modify | Full Access |
|---|---|---|---|---|---|
| View Content |

|

|

|

|

|
| Download, Print, Save, Sync to Workplace Folder |

|

|

|

|
|
| Email to Project (if enabled2) |

|

|
|||
| Copy Folder Shares with Folder3 |

|
||||
| Change Files |

|

|

|
||
| Add Files |

|

|
|||
| Delete Files |

|
||||
| Undelete Files4 |

|
||||
|
1 Items viewed by users with Online View Only access may be watermarked, depending on whether or not the Watermark Preview policy is enabled for their policy profile. For more information, refer to Policy Profiles and Select Policies. 2 For more information about the Email to Project feature, refer to Uploading files to a project or folder via email. 3 You may only copy folder shares along with the contents of a folder if you are the project owner or if you have full access to the project and reshare permissions for both the original project and the project you are copying the folder to. 4 For more information, please refer to Deleting and undeleting. |
|||||
Share safely
To ensure you only share the files you intend to share, please note:
- Permissions are granular. This means that, if you like, you can provide access to only certain folders within a project. If you want users to only have access to specific folders, then only share those specific folders with them. They will see the project and the folder structure leading to the shared folder, but will not see any other folders or files in the project structure.
- Permissions are inherited. Any folders and files within the project or folder you have shared will automatically have the same permissions applied to them.
- A lower level of permissions cannot be applied than the inherited permission. For instance, if you have given Full Access to a project, you cannot restrict that user to Read-Only or Modify permissions for any of the contents of that project. This also means that access cannot be restricted to a folder or file within a project or folder that has been shared.
- Permissions can be increased for sub-folders. For instance, if you’ve granted Online View Only at the project level, you can grant Modify access to a sub-folder and Full Access to a sub-folder within that sub-folder.
- The permissions for Reshares and Public Shares are inherited by subfolders. The top-level folder's permissions apply to all subfolders.
How to...
- Locate the project, folder, or file in any of these locations:
PERMISSIONS You will not be able to share a project or folder unless you are either the project owner, or another user who has been granted reshare permission, has granted reshare permissions to you.
IMPORTANT Projects must be shared with a specific Workplace server before they can be synced to that server.
IMPORTANT Projects must be shared with a file sharing integration before they can be accessed through that integration.
- Locate the project or folder you wish to share in any of these locations:
- Use on the following methods to access the Team Shares view, depending where you are:
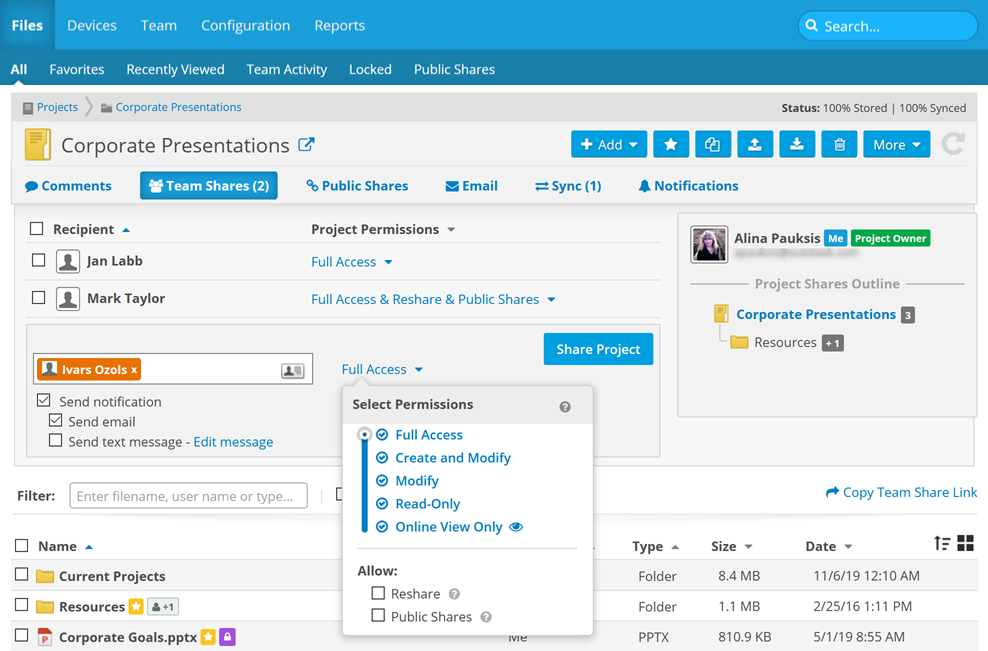
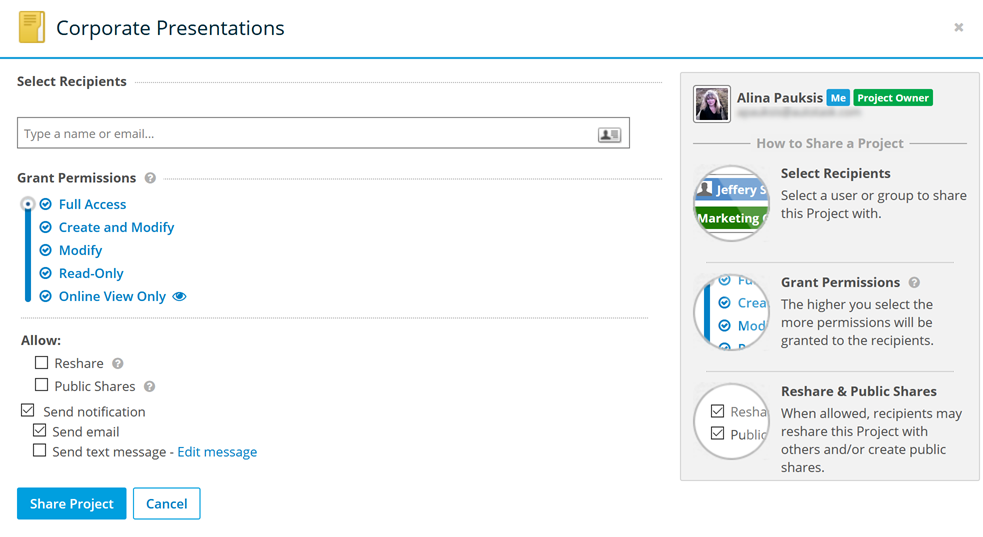
- Type the name or email address of the individual share recipient/server/integration, or click the
 icon and select the share recipient there.
NOTE You have the option of sharing with Groups of resources, or with the All group, which includes all users, but not servers or integrations. To share with a server or an integration, the server or integration must be selected explicitly.
- Adjust the access level you wish to grant to the share recipient(s) from the Select Permissions dropdown list.
- Optionally, select the Reshare check box, the Public Shares check box, or both. The Reshare option allows the recipient to access the Team Shares tab and share the item with other members of the team. The Public Shares option allows the recipient to create public shares for the item.
NOTE You will only be able to grant permissions equal to or less than your own permissions to that project or folder.
NOTE You cannot grant reshare or public shares permissions to restricted users. Even if they are granted full access, they will not be able to access those functions. For more information, please refer to User types.
- Optionally, select the Send notification check box. This will expand two more options. Send email is selected by default, but you may choose to send a text message in addition to, or instead of, an email notification. If you wish to modify the text message, click the Edit message link and edit the message in the text box. You may use up to 899 characters.
- Click the Share (Project or Folder) button.
In order to share a file, you must share the entire folder in which the file is located with the team share recipient. To do so, refer to Share a project or folder.
If you want another resource to see only one specific file, use the Managing project, folder, and file public shares option.
NOTE You will only be able to modify the access levels of other users if you own the project or have Reshare permissions for the project or folder. You cannot grant greater access to another user than you have. For example, if you have Create & Modify permissions, you cannot grant another user Full Access permissions.
NOTE Only the project owner can revoke reshare permissions.
- Go to the Team Shares view for the item for which you want to modify permissions.
- Click the access level for the share recipient(s) in the (Project or Folder) Permissions column.
- Modify the share recipient's permissions as necessary.
- Click Save.
NOTE Alternatively, you can hover over the share recipient and click the ![]() icon, or right-click the share recipient, and select Update Permissions. This will open the Update Permissions popup.
icon, or right-click the share recipient, and select Update Permissions. This will open the Update Permissions popup.
Make your changes and click the Update Permissions button.
- Go to the share view for the item for which you want to remove permissions.
- Hover over the share recipient and click the
 icon, or right-click the share recipient.
 - Select Remove from Project. This will open the Remove from (Project or Folder) popup:
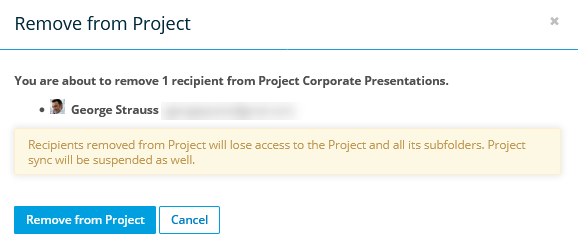
- If the resource has been granted different access levels for different portions of the project, you can select the check box corresponding to a folder to remove them from that folder and its contents only.
NOTE Resources or groups removed from the project or folder will lose access to the item and all sub-folders and files. Project sync will also be suspended.
- Click the Remove from (Project or Folder) button to confirm.
- Go to the Team Share view and locate the share recipient you wish to email.
- Hover over the share recipient and click the
 icon, or right-click the resource.
 - Select Email. This will open a new message to the share recipient in your default email application.
- Click the check box in the table header to select all recipients or select the check boxes for multiple individual team share recipients.
- Select the function you want to perform from the menu that appears to the left of the list.
- Complete the function as described in one of the areas above.
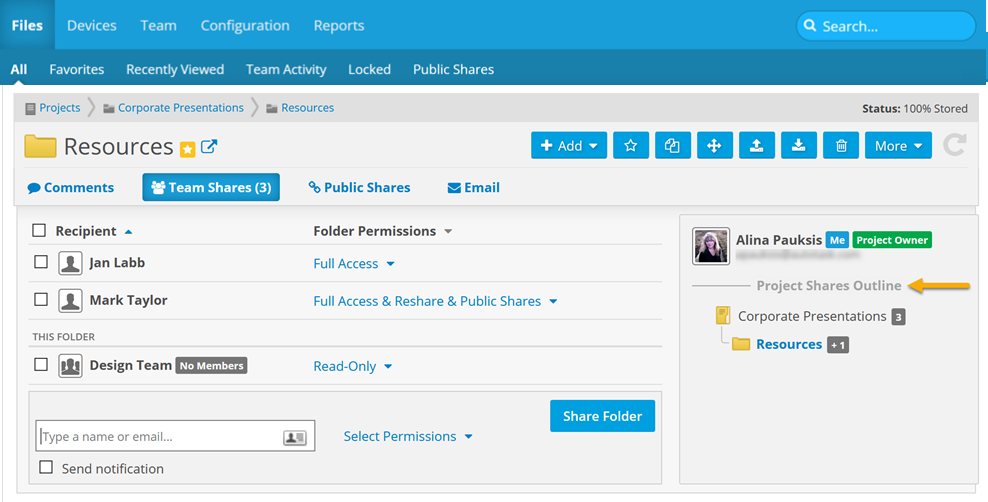
The Project Shares Outline displays the project and folder team share structure and provides links to the Team Shares view of each. The number of share recipients appears next to the project or folder name. The outline format allows you to easily navigate to other shared folders in the project.
EXAMPLE This feature is particularly useful when you want to grant a access to a file. In order to do so, you would click the folder or project link and grant access at that level.
To use the Project Shares Outline, click on another level in the outline. This will open the Team Shares view at that level of the project.
