PERMISSIONS All users
PERMISSIONS Depending on your permissions for specific projects (e.g. Read-Only, Create & Modify, etc.), some of the functions described in this topic may not be accessible to you. Refer to Manage project, folder, and file team shares for more information.
NAVIGATION Workplace Online > Files > Click a folder or click a project, then a folder
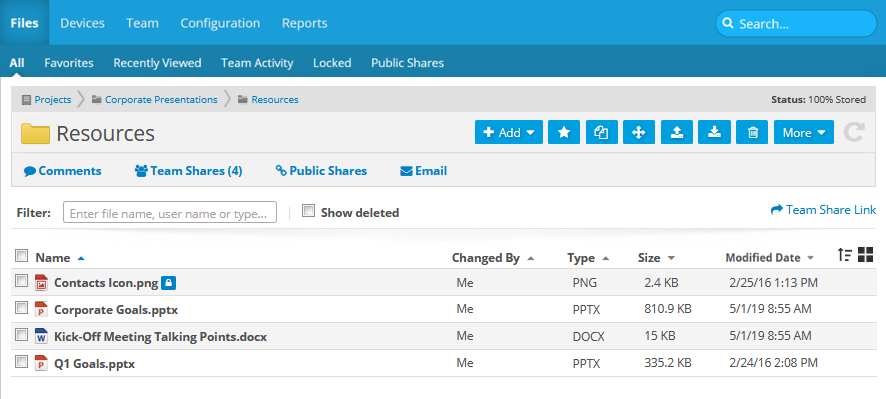
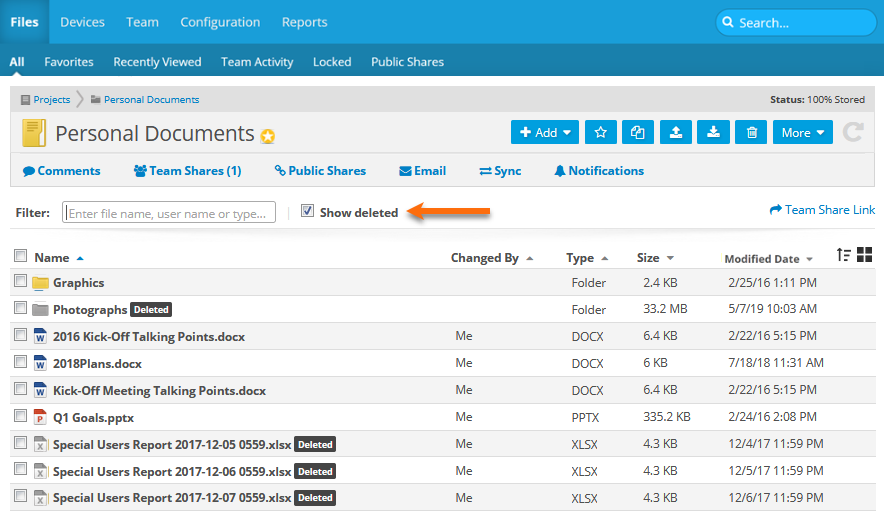
The Folder Detail page displays information about the project folder, lists all sub-folders and files in the folder, and provides access to a variety of related functions.
The Folder Detail is comprised of several different areas:
The folder name and items in the folder and file list may be followed by several different icons:
| Icon | Meaning |
|
|
Favorite. Refer to Favorites. |
|
|
Publicly linked. Refer to Managing project, folder, and file public shares. |
|
|
The file has been hidden. This means that it is hidden from your views but not deleted. Other users can still see it. |
|
|
The folder has been deleted. Refer to Deleting and undeleting. |
|
(Folder name only) |
Reveal in Explorer (Windows) or Finder (Mac). Click to open the corresponding folder on your desktop or laptop. This option requires that Workplace Desktop is installed on your computer. |
The toolbar allows you to quickly access a variety of functions. For more detailed information, refer to Manage the folder using the toolbar.
Above the folder and file list, a series of links expand and collapse areas that provide additional related functionality:
For more information on these areas, refer to:
The area below the comment alert displays your access level for this folder. Refer to Manage project, folder, and file team shares for more information.
When performing a copy, revert, or restore operation within Workplace Online, a progress bar is displayed at the bottom of the window.
For more information, refer to The task progress bar.
How to...
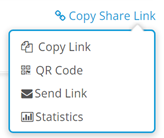
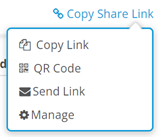
If the folder has been publicly shared, Share Public Link will appear at the top right of the folder content list, and a Public badge will be displayed next to the folder name. If the folder has not been shared publicly, Share Team Link will be displayed instead. Additional options are displayed when you hover over the links or the badge.
TIP For more information about public shares and team shares, please refer to Managing project, folder, and file public shares and Manage project, folder, and file team shares
| Publicly Shared | Not Publicly Shared |
|---|---|
|
|
Hover over Public Share Link, the Public badge, or Team Share Link, then select one of the options described in the table below:
| Option | How it works |
|---|---|
| Copy Link | Places the link on your clipboard. |
| QR Code | Opens the QR Code popup. Click the Copy to Clipboard button to place the QR code on your clipboard. |
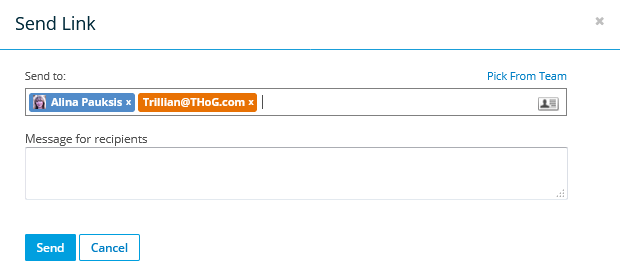
| Send Link |
Opens the Send Link popup window, allowing you to email the link to one or more recipients: |
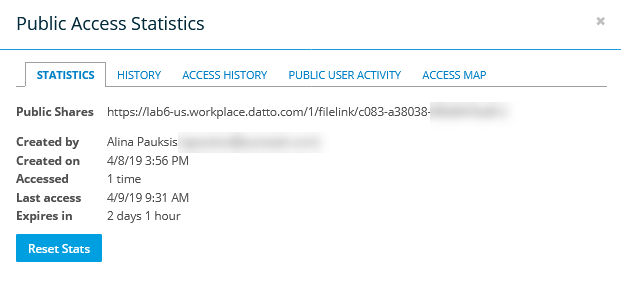
| Statistics (public shares only) |
Opens the Public Access Statistics popup window: The popup window displays statistics, history, access history, public user activity, and an access map. Click a tab title to change the statistics view. |
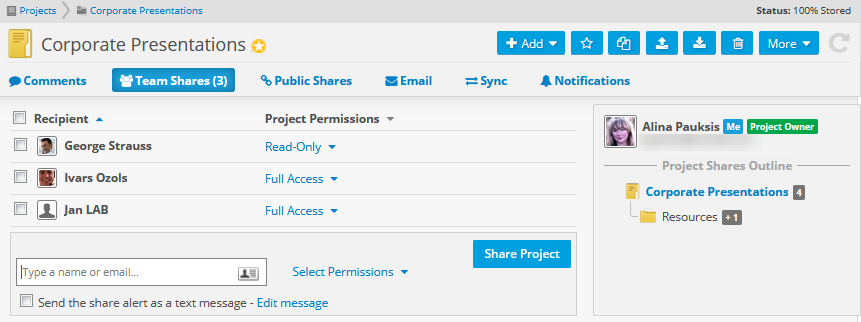
| Edit (team shares only) |
Click to open the team shares interface: For detailed information on creating and editing team shares, please refer to Manage project, folder, and file team shares. |
- Click the
 icon. This will open the sort popup window:
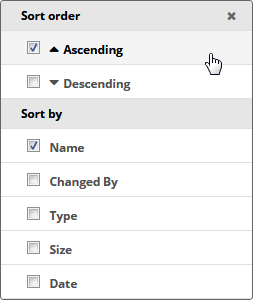
- Check boxes will indicate the current sort order. To control ascending/descending order, just change the selection. To sort by a different column, select the check box for that column.
NOTE You changes are automatically applied, and Workplace will remember your sort preferences the next time you view the page.
Click the Refresh button  to the right of the file toolbar.
TIP The view controls are located in the upper right corner of the list.
- Click the
 control to view the sub-folders and files in gallery view.
 - Click the
 control to view the sub-folders and files in list view.
The toolbar at the top right of the page allows you to quickly access a variety of folder functions.
| Button | Menu > Submenu | Function |
|---|---|---|
| Add Folder | Add a sub-folder. This will open the Create New Folder popup window: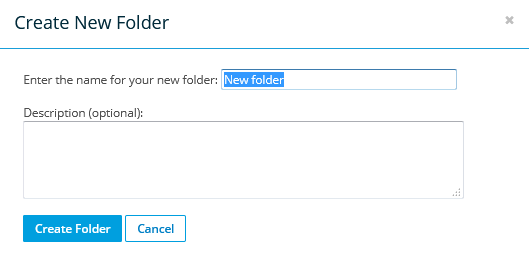 Enter the folder name and optionally add a description, then click Create Folder. |
|
| Word Document | Add a Word document to the folder. This will open the Create New Document popup window: Enter the document name, then click Create Document. Refer to Creating and editing documents online. |
|
| Excel Spreadsheet | Add an Excel spreadsheet to the folder. This will open the Create New Document popup window. Enter the spreadsheet name, then click Create Document. Refer to Creating and editing documents online. |
|
| Powerpoint Presentation | Add a Powerpoint presentation to the folder. This will open the Create New Document popup window. Enter the presentation name, then click Create Document. Refer to Creating and editing documents online. |
|
Favorite/Unfavorite  |
Add the folder to or remove the folder from your Favorites list. If you are using Workplace Mobile 3.9 or earlier, your favorites will be automatically synced to your tablet or smartphone, and unfavoriting a file in those versions will result in its removal from your tablet or smartphone. |
|
Copy |
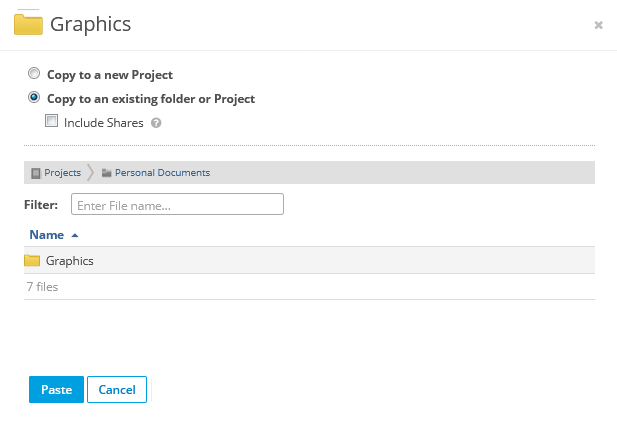
Copy the folder to a different location or to a new project. Depending on your project access levels, you may have the option to copy the folder team shares as well as the contents of the folder in the Copy Folder popup window: PERMISSIONS You may only copy folder team shares if you are the project owner or have full access to the project and reshare permissions for both the original project and the project you are copying the folder to. |
|
Move |
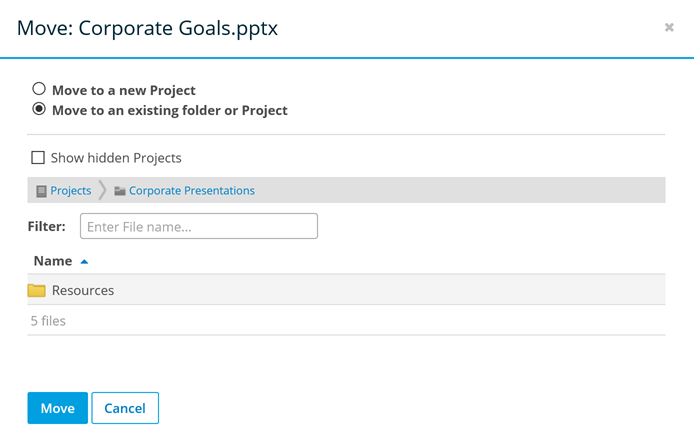
Move the folder to a different location or to a new project. This will open the Move Folder popup window: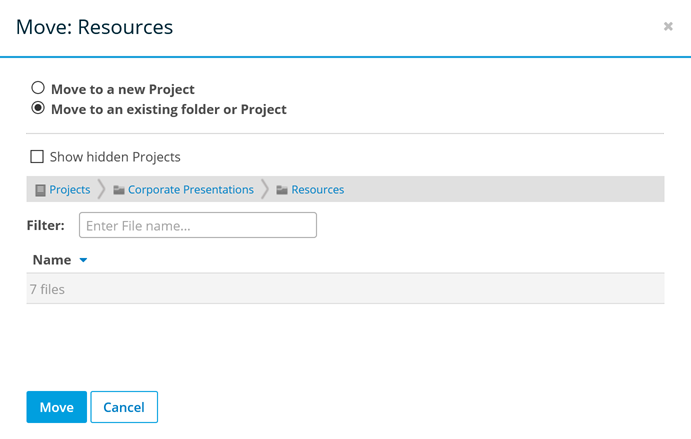 To move to a new project, select the appropriate check box, enter the name of the new project, then click Move. To move to an existing location, select the appropriate check box, browse for the new location in the area provided, then click Move. |
|
Upload |
Upload files or folders to this folder project.  Drag and drop files or folders into the cloud image or click Select Files to Upload to browse for files. Refer to Uploading items to Workplace Online. |
|
Download |
Download | Download the folder to your computer's default download location. |
Delete |
Delete the entire folder and all files in the folder. This will open the Delete Folder popup window: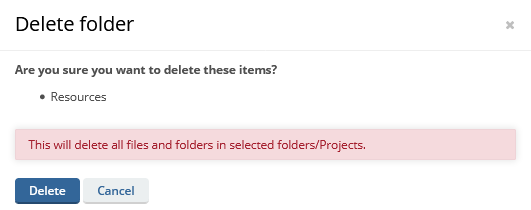 Confirm your action in the Delete Folder popup window. BEFORE YOU DELETE a project, please read Deleting and undeleting. |
|
More |
All Add options | Refer to the Add section of this table. |
| Reveal in Explorer (Windows) Reveal in Finder (Mac) |
Open the corresponding folder on your desktop or laptop. | |
| Favorite/Unfavorite | Refer to the Favorite/Unfavorite section of this table. | |
| Copy | Refer to the Copy section of this table. | |
| Move | Refer to the Move section of this table. | |
| Upload | Refer to the Upload section of this table. | |
| Download > Download | Download the project to your computer's default download location. | |
| Download > Restore | Restore this project to a desired location on your desktop or laptop. Note that this option requires that Workplace Desktop is installed on the computer. |
|
|
|
Manage > Rename | Rename the project. This will open the Rename Project popup window: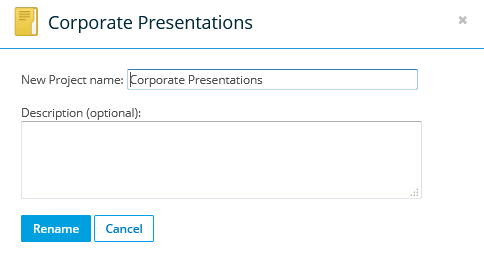 Edit the project name, optionally update the description, then click Rename. |
| Manage > Previous Versions | View previous versions of the project. Refer to Previous Versions. | |
| Manage > Recursive Undelete |
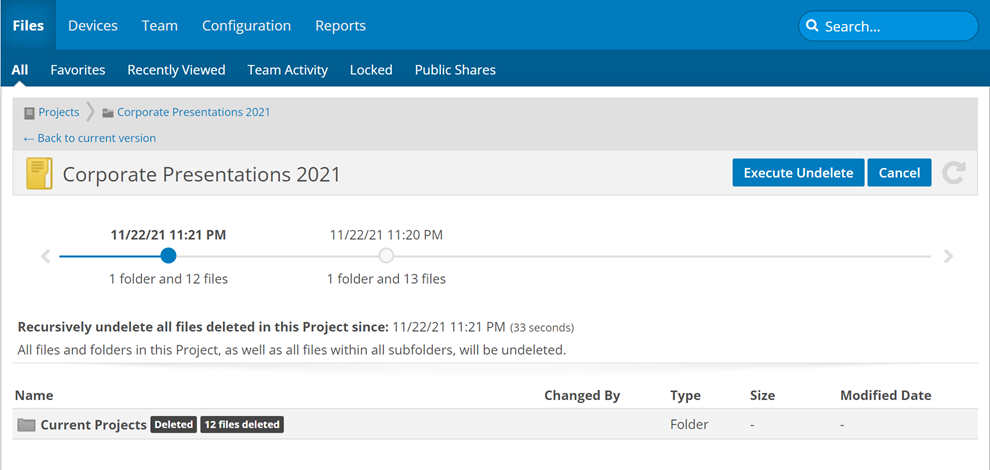
If files or folders have been mistakenly deleted and you are the project owner or a Super Administrator, Recursive Undelete allows you to apply a mass undelete to a folder, including deleted files within sub-folders, that will reinstate all files deleted since a specified time. Use the timeline to specify the date and time from which you would like to undo all deletions, then click Execute Undelete. |
|
| Manage > Delete | Refer to the Delete section of this table. | |
| Comment | Add a project comment. This will open the Add New Comment popup window: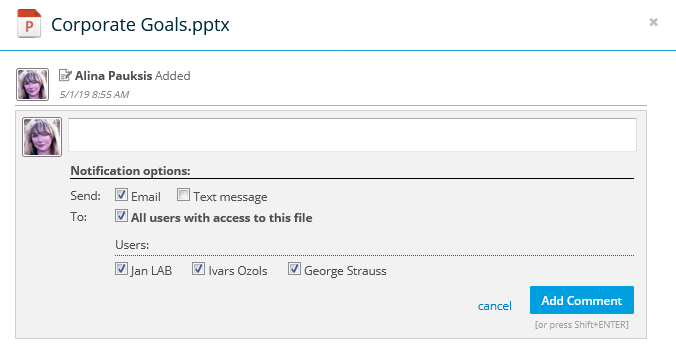 Enter your text, then click Add Comment. |
|
| Share > Team Share This option is only available if you are the project owner or Reshare permissions were granted when the folder was shared with you. |
Share the folder with one or more users. For details, refer to Manage project, folder, and file team shares. | |
| Share > Public Share This option is available to project owners and if Reshare permissions were granted when the project was shared with you unless restricted by Policy Profiles |
Create a public share for the folder. For details, refer to Managing project, folder, and file public shares. |
Hover over the folder and click the ![]() icon, or right-click the folder. Then select one of the options described in the table below:
icon, or right-click the folder. Then select one of the options described in the table below:
| Menu Item | Sub-Menu Item | Function |
|---|---|---|
| Add | Add Folder | Add a sub-folder. This will open the Create New Folder popup window: Enter the folder name and optionally add a description, then click Create Folder. |
| Word Document | Add a Word document to your folder. This will open the Create New Document popup window. Enter the document name, then click Create Document. Refer to Creating and editing documents online. |
|
| Excel Spreadsheet | Select to add an Excel spreadsheet to your folder. This will open the Create New Document popup window. Enter the spreadsheet name, then click Create Document. Refer to Creating and editing documents online. |
|
| Powerpoint Presentation | Add a Powerpoint presentation to your folder. This will open the Create New Document popup window. Enter the presentation name, then click Create Document. Refer to Creating and editing documents online. |
|
| Reveal in Explorer (Windows) Reveal in Finder (Mac) |
Open the corresponding folder on your desktop or laptop. Note that this option requires a Workplace Desktop Agent installed on the computer. |
|
| Favorite/Unfavorite | Add the folder to or remove the folder from your Favorites list. | |
| Copy |
Copy the folder to a different location or to a new project. Depending on your project access levels, you may have the option to copy the folder shares as well as the contents of the folder in the Copy Folder popup window: PERMISSIONS You may only copy folder shares if you are the project owner or have full access to the project and reshare permissions for both the original project and the project you are copying the folder to. |
|
| Move |
Move the folder to a different location or to a new project. This will open the Move Folder popup window: If you wish to move the item to a hidden project, select the Show hidden projects check box. To move to a new project, select the appropriate check box, enter the name of the new project, then click Move. |
|
| Upload | Upload files or folders to this folder project.  Drag and drop files or folders into the cloud image or click Select Files to Upload to browse for files. Refer to Uploading items to Workplace Online. |
|
| Download | Download | Download the folder to your computer's default download location. |
| Restore | Restore this folder to a desired location on your desktop or laptop. Note that this option requires a Workplace Desktop Agent installed on the computer. |
|
| Manage | Rename | Rename the folder. This will open the Rename Folder popup window: Edit the folder name, optionally update the description, then click Rename. |
| Previous Versions | View previous versions of the folder. Refer to Previous Versions. | |
| Manage > Recursive Undelete |
If files or folders have been mistakenly deleted and you are the project owner or a Super Administrator, Recursive Undelete allows you to apply a mass undelete to a folder, including deleted files within sub-folders, that will reinstate all files deleted since a specified time.
NOTE This option is not available for files that have been quarantined as a result of a malware incident. |
|
| Delete | Delete the entire folder and all files and sub folders in the project. Confirm your action in the Delete Folder popup window. BEFORE YOU DELETE a folder, please read Deleting and undeleting. |
|
| Comment | Add a folder comment. This will open the Add New Comment popup window: Enter your text, then click Add Comment. |
|
| Share | Team Share This option is only available if you are the project owner or Reshare permissions were granted when the folder was shared with you. |
Share the folder with one or more team users. For details, refer to Manage project, folder, and file team shares. |
| Public Share This option is available to project owners and if Reshare permissions were granted when the project was shared with you unless restricted by Policy Profiles |
Create a public share for the folder. For details, refer to Managing project, folder, and file public shares. |
Hover over the file and click the ![]() icon, or right-click the file. Then select one of the options described in the table below:
icon, or right-click the file. Then select one of the options described in the table below:
| Menu Item | Sub-Menu Item | Function |
|---|---|---|
| Open | Open the file with the default method you selected on the Document Editors page. If you have not selected a default document editor, you will be prompted to select one. Refer to Creating and editing documents online. If you have configured Desktop Integration, you have the option of selecting an integrated device. This will allow you to Edit documents locally via Workplace Online. |
|
| View | Preview a version of the file via the browser. | |
| Favorite/Unfavorite | Add the file to or remove the file from your Favorites list. Your favorites will be automatically synced to your tablet or smartphone, and unfavoriting a file in those versions will result in its removal from your tablet or smartphone. |
|
| Lock/Unlock | Lock or unlock a file. A When viewing files on the Locked list, Unlock will be the only option. For more informationon file locking, please refer to Lock files. |
|
| Copy | Copy the item to a different location or to a new project. This will open the Copy File popup window: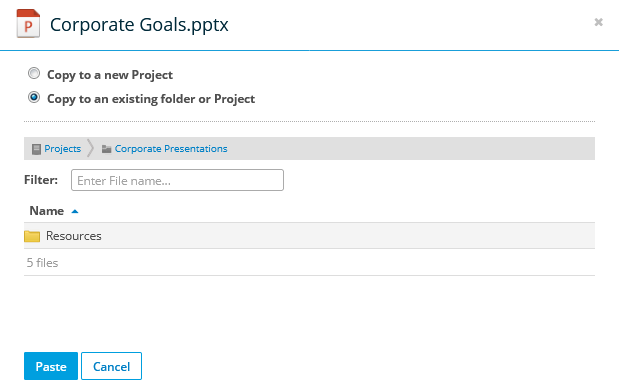 To copy to a new project, select the appropriate check box, enter the name of the new project, then click Copy. To copy to an existing location, select the appropriate check box, browse for the new location in the area provided, then click Copy. |
|
| Move |
Move the file to a different location or to a new project. This will open the Move File popup window: If you wish to move the item to a hidden project, select the Show hidden projects check box. To move to a new project, select the appropriate check box, enter the name of the new project, then click Move. |
|
| Upload | Upload a file to this folder.  Just drag and drop a file into the cloud image or click Select Files to Upload to browse for a file. Refer to Uploading items to Workplace Online. |
|
| Download | Download |
Download the file to your computer's default download location. NOTE This option is not available for files that have been quarantined as a result of a malware incident. |
| Download as .PDF |
Download a .pdf version of the file. NOTE This option is not available for files that have been quarantined as a result of a malware incident. |
|
| Restore |
Restore this file to a desired location on your desktop or laptop. NOTE This option is not available for files that have been quarantined as a result of a malware incident. |
|
| Manage | Rename | Rename the file. This will open the Rename File popup window: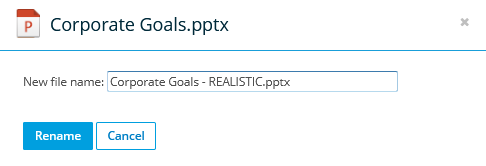 Edit the file name, then click Rename. |
| Previous Versions | View previous versions of the file. Refer to Previous Versions. | |
| Delete | Delete the file. Confirm the deletion in the Delete File popup window. BEFORE YOU DELETE a file, please read Deleting and undeleting. |
|
| Comment | Add a file comment. This will open the Add New Comment popup window: Enter your text, then click Add Comment. |
|
Email the file to one or more recipients. This will open the Send File popup window: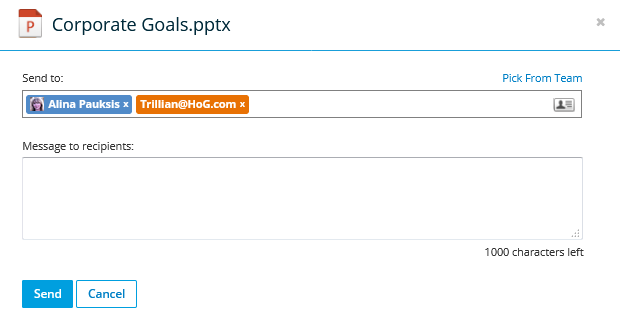 Begin typing a name or email address or click the Pick From Team link or the Optionally, add a message, then click Send. |
||
| Print the document or send a print link to one or more recipients. Refer to Print a file for more information. | ||
|
Public Share This option is available to project owners and if Reshare permissions were granted when the project was shared with you unless restricted by Policy Profiles |
|
Create a public share for the file. For details, refer to Managing project, folder, and file public shares. |
